Please note this post may contain affiliate links picked by me (Jay) that I have deemed may be of interest or relevant to you the reader of this.
These links do not affect the cost of the thing if you decide to purchase but i may get a little money if you choose to purchase.
For more information on my affiliate link policy click here.
The Beauty of Night-time: Capturing the World After Dark
As a photography junkie, I am always on the lookout for new and exciting ways to capture the world around me. And one of my favourite times to shoot is at night. There is something truly magical about the way that the world transforms after dark, and as a photographer, I am constantly inspired by the beauty of night-time.
Capturing the world after dark can be a challenging task, but with the right gear and techniques, it is possible to create stunning images that truly capture the essence of the night. In this article, I will be discussing some of my favourite tips and tricks for shooting at night, as well as the gear that I use to capture these incredible moments.
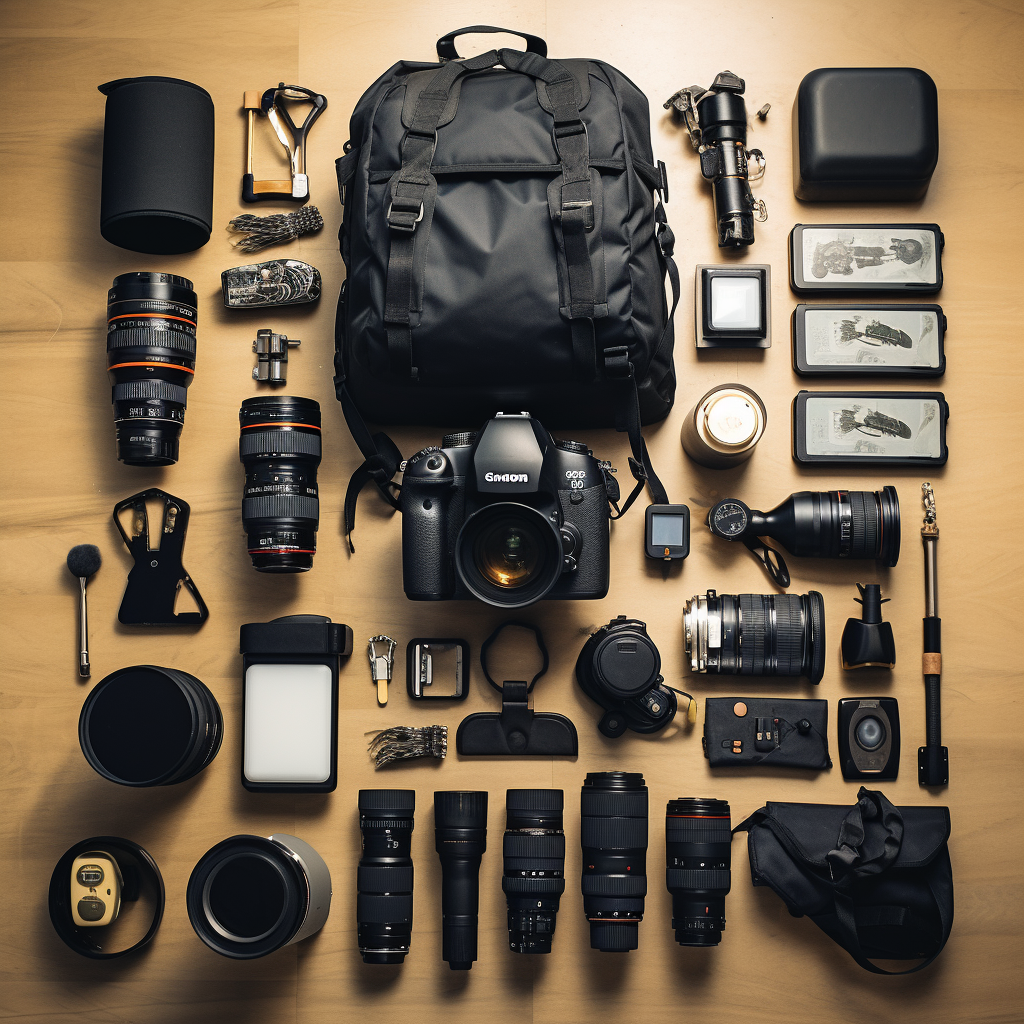
Gear for Night-time Photography
Before we dive into the techniques, let’s talk about gear. When shooting at night, there are a few essential pieces of gear that you will need in order to capture the perfect shot.
Camera: First and foremost, you will need a camera that is capable of shooting in low-light conditions. A camera with a large sensor and a high ISO range will allow you to capture more light and create sharper images.
Lens: A fast lens with a wide aperture will also be essential for night-time photography. Look for lenses with an aperture of f/2.8 or wider, as these will allow you to capture more light and create a shallower depth of field.
Tripod: Because you will be shooting in low-light conditions, you will need to use slower shutter speeds to capture enough light. This means that a sturdy tripod will be essential to keep your camera steady and prevent blur.
Remote Shutter Release: A remote shutter release will allow you to take photos without touching the camera, which can help prevent camera shake and ensure that your shots are sharp.
Flash: While it is possible to shoot without a flash, a good external flash can help you to light your subject and create more interesting images. Look for a flash with a high guide number and the ability to tilt and swivel.
Techniques for Night-time Photography
Now that we’ve covered the essential gear, let’s talk about some of my favourite techniques for shooting at night.
Use Manual Mode
When shooting at night, it is important to use manual mode so that you have complete control over your camera’s settings. Start by setting your ISO to the highest possible setting that still produces acceptable image quality. Next, set your aperture to the widest possible setting and your shutter speed to a few seconds or more, depending on the amount of light available. Use your camera’s live view feature to focus on your subject and adjust the focus manually until it is sharp.


Experiment with Long Exposures
Long exposures are a great way to capture the beauty of the night. By using slow shutter speeds, you can create stunning images that capture the movement of the night sky or the lights of a city. Experiment with different shutter speeds and try using a neutral density filter to create even longer exposures.
Use Flash to Light Your Subject
If you are shooting portraits or other types of photos that require a subject, consider using a flash to light your subject. This will create a more interesting image and help to balance the light in the scene. Use a flash with a high guide number and the ability to tilt and swivel to create a natural-looking light.
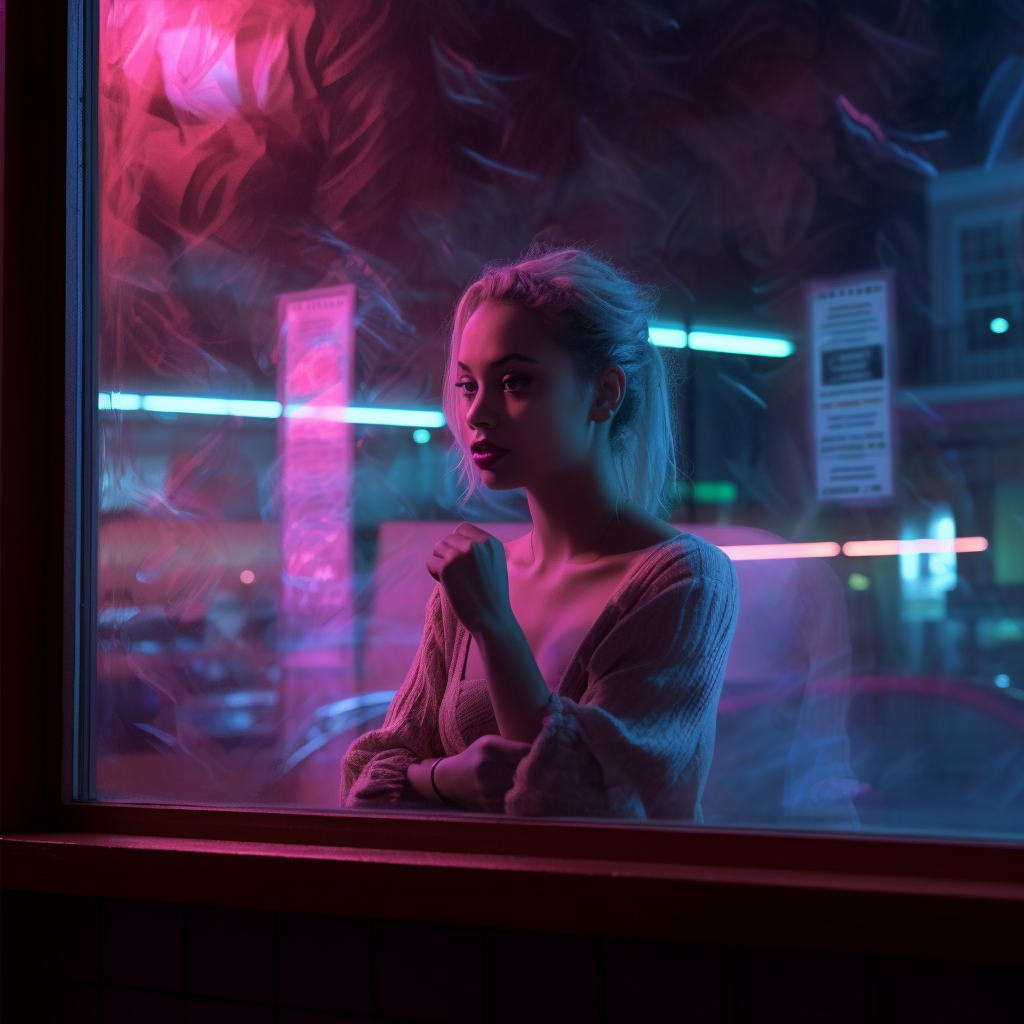
Look for Interesting Light Sources
One of the best things about shooting at night is the variety of interesting light sources that you can find. Look for streetlights, neon signs, car headlights, and other sources of light that can add interest to your photos. Use these light sources to create unique compositions and add depth to your images.
Shoot During Blue Hour
Blue hour is the period of time just after sunset
and just before complete darkness. It is a magical time to shoot because the sky takes on a beautiful blue hue that is perfect for creating moody and atmospheric images. During blue hour, you can capture the contrast between the warm artificial light of the city and the cool blue light of the sky. To shoot during blue hour, start by setting your camera to manual mode and use a tripod to keep your camera steady. Use a low ISO setting to reduce noise in your images, and a wide aperture to let in as much light as possible. Experiment with different shutter speeds to create the perfect exposure.
|
|


Capture Star Trails
Star trails are a beautiful way to capture the movement of the stars in the night sky. To create star trails, you will need to use a long exposure, typically between 30 seconds and several minutes. Set your camera to manual mode and use a wide-angle lens to capture as much of the sky as possible. Focus on a bright star using manual focus, and then set your camera to bulb mode. Use a remote shutter release to keep the shutter open for the desired length of time, and watch as the stars create beautiful trails across the sky.
Use Light Painting
Light painting is a fun and creative way to add interest to your night-time photos. To create light painting, you will need a dark location, a tripod, a light source, and a long exposure. Set your camera to manual mode and use a low ISO setting to reduce noise in your images. Set your shutter speed to a few seconds or more, and use a remote shutter release to keep the shutter open. Use a flashlight or other light source to “paint” light onto your subject or the background of your image. Experiment with different techniques to create unique and interesting images.
Shoot in RAW
Shooting in RAW is always a good idea, but it is especially important when shooting at night. RAW files contain more data than JPEG files, which means that you will have more flexibility when it comes to editing your images. Shooting in RAW will also allow you to adjust the exposure, color balance, and other settings after the fact, which can be incredibly useful when shooting in challenging lighting conditions.
Community Discussion
If you have any questions about night-time photography or any of the techniques and gear that I’ve mentioned in this article, don’t hesitate to drop a comment in the community section on our website. We would love to hear from you and help you to improve your night-time photography skills.
Conclusion
Capturing the world after dark can be a challenging but incredibly rewarding experience for photographers. With the right gear and techniques, you can create stunning images that truly capture the essence of the night. Whether you are shooting star trails, light painting, or simply exploring the beauty of the night, I hope that this article has inspired you to pick up your camera and start shooting. Remember to experiment, have fun, and never stop learning. Happy shooting!