Please note this post may contain affiliate links picked by me (Jay) that I have deemed may be of interest or relevant to you the reader of this.
These links do not affect the cost of the thing if you decide to purchase but i may get a little money if you choose to purchase.
For more information on my affiliate link policy click here.
Mastering Macro: Tips and Tricks for Stunning Close-Up Photography
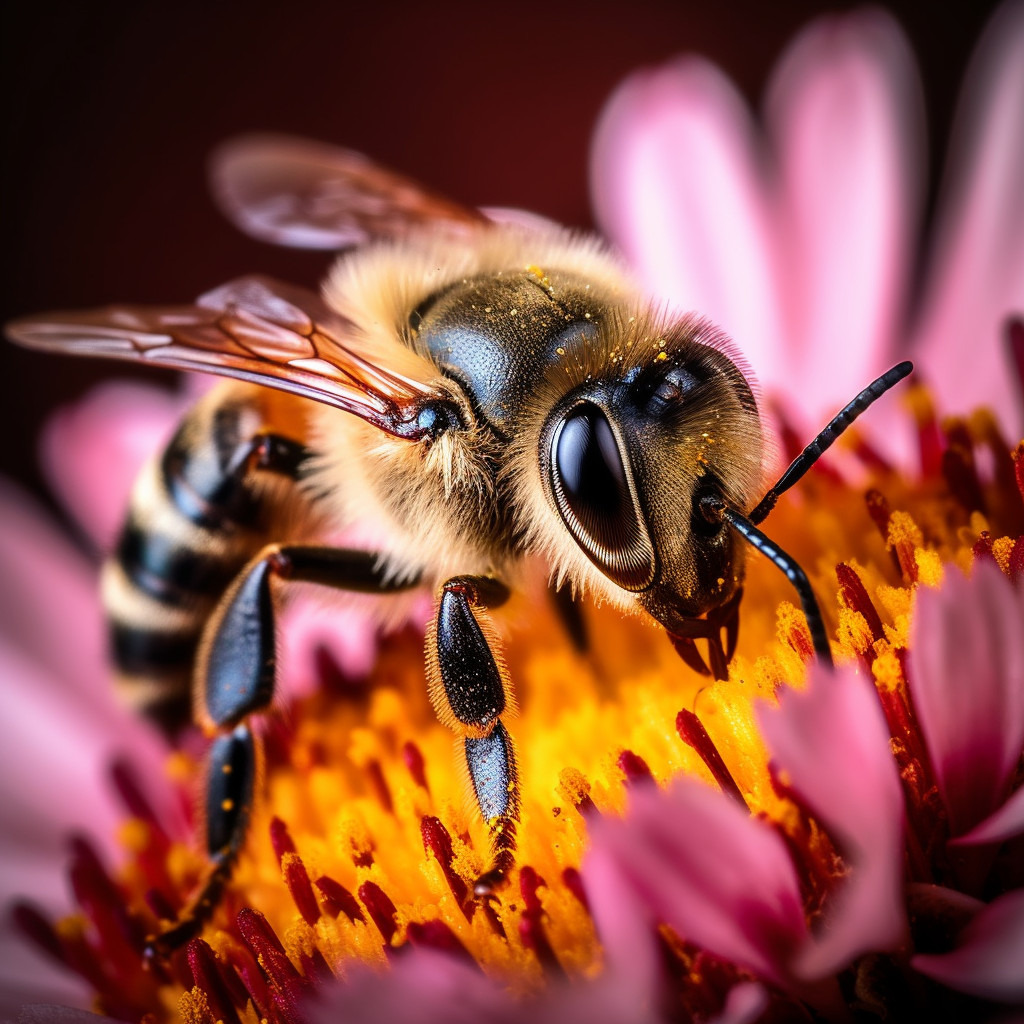
As a photography junkie, you understand the importance of capturing those intimate and intricate details in your subjects that can only be achieved through close-up photography, also known as macro photography. Whether you’re a professional photographer or an enthusiast, mastering macro photography can take your skills to the next level and open up a whole new world of creativity.
Macro photography is the art of capturing small subjects or details in extreme close-up, allowing for a level of detail and clarity that is not visible to the naked eye. From the intricate patterns on the wings of a butterfly to the texture on a leaf, macro photography reveals a whole new world that can be explored through the lens.
To master macro photography, it’s important to have the right gear, technique, and approach. In this article, we’ll take a deep dive into the world of macro photography and provide you with tips and tricks for capturing stunning close-up photos.
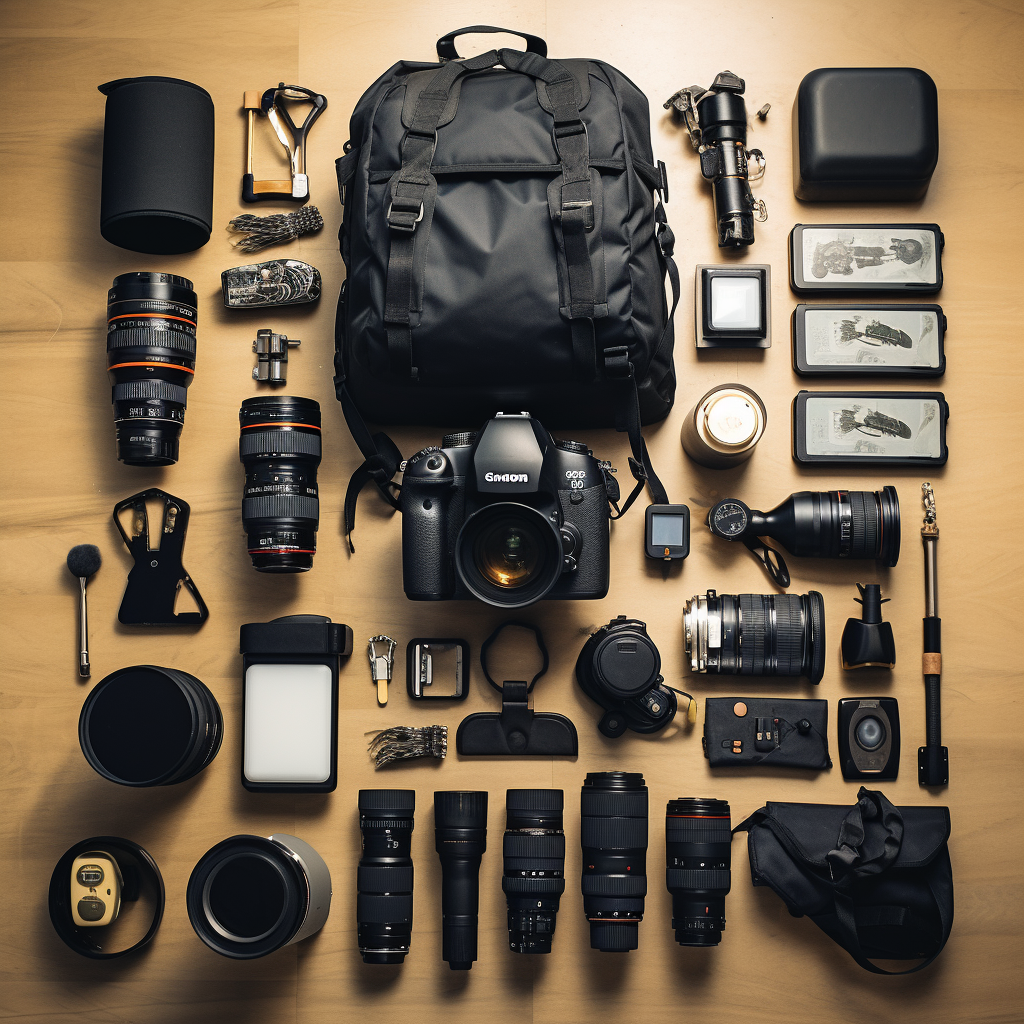
Gear for Macro Photography
The gear you use for macro photography can make a huge difference in the quality of your photos. Here are some essential pieces of gear you’ll need to get started with macro photography:
- Macro Lens: A macro lens is designed to allow you to focus very close to your subject and capture the fine details. There are a variety of macro lenses available on the market, ranging from 50mm to 200mm. Some popular options include the Canon EF 100mm f/2.8L Macro IS USM and the Nikon AF-S VR Micro-NIKKOR 105mm f/2.8G IF-ED.
- Extension Tubes: Extension tubes are an inexpensive way to turn any lens into a macro lens. They fit between your camera body and lens, allowing you to focus closer to your subject. They come in different sizes and can be stacked together to increase the magnification.
- Tripod: A tripod is essential for macro photography as it allows you to stabilize your camera and keep it steady while shooting. Look for a tripod with a center column that can be positioned horizontally to allow for different shooting angles.
- Flash: A flash can be used to add additional light to your subject and fill in shadows. A ring flash is a popular option for macro photography as it provides even lighting around the subject.
- Remote Shutter Release: A remote shutter release is a handy accessory that allows you to trigger your camera without touching it. This can help prevent camera shake and produce sharper images.
|
|


Techniques for Macro Photography
Once you have your gear in place, it’s time to start shooting. Here are some tips and techniques for mastering macro photography:
-
Get Close:
The key to macro photography is getting as close to your subject as possible. This can mean physically getting closer or using a lens that allows you to focus at a closer distance. The closer you get, the more detail you’ll be able to capture.
-
Use a Small Aperture:
When shooting macro, it’s important to use a small aperture (a high f-stop number) to increase your depth of field. This will ensure that your subject is in sharp focus from front to back. However, using a small aperture also means less light will be entering your camera, so you’ll need to compensate by using a longer shutter speed or increasing your ISO.
-
Use Manual Focus:
In macro photography, autofocus can often struggle to find the right focus point, especially if you’re shooting a moving subject. It’s best to use manual focus to ensure that your subject is in sharp focus. Use your camera’s focus peaking or zoom function to check that your subject is in focus.
-
Experiment with Lighting:
Macro photography often requires additional lighting to bring out the details in your subject. Try using natural light or a combination of natural and artificial light to see what works best for your
subject. If you’re shooting outdoors, try to shoot in the early morning or late afternoon when the light is softer and more diffused. You can also use a reflector to bounce light back onto your subject and fill in any shadows.


-
Use a Tripod:
As mentioned earlier, using a tripod is essential for macro photography. It allows you to keep your camera steady and avoid any camera shake, which can result in blurry images. Use a remote shutter release or your camera’s self-timer to trigger the shutter without touching the camera.
-
Pay Attention to Composition:
Just like any other genre of photography, composition is key in macro photography. Look for interesting angles and perspectives to capture your subject from. Use the rule of thirds to place your subject off-center and create a more dynamic composition.
-
Be Patient:
Macro photography can be a slow and methodical process, especially when shooting moving subjects like insects or flowers in the wind. Be patient and take your time to get the shot you want. Wait for the right moment and don’t be afraid to take multiple shots to ensure you get the perfect shot.
Tips and Tricks for Stunning Macro Photography
Here are some additional tips and tricks to take your macro photography to the next level:
- Focus Stacking: Focus stacking is a technique where you take multiple shots at different focus points and blend them together in post-processing to create a single image with a wider depth of field. This can be particularly useful when shooting subjects with intricate details that require a wider depth of field.
- Use a Polarizer: A polarizing filter can be used to reduce reflections and glare on shiny surfaces, like water droplets or insect wings. It can also help to deepen the colors in your subject and create a more saturated image.
- Experiment with Different Perspectives: Don’t be afraid to experiment with different perspectives when shooting macro. Try shooting from a low angle or getting up close and personal with your subject. This can help to create a unique and interesting image.
- Use a Diffuser: When shooting with artificial light, try using a diffuser to soften the light and create a more natural look. A piece of white tissue paper or a commercial diffuser can be used to create a soft and even light source.
- Shoot in RAW: Shooting in RAW format allows you to capture all the data from your camera’s sensor, giving you more flexibility in post-processing. This can be particularly useful when adjusting the exposure or white balance of your image.
- Practice, Practice, Practice: Like any other skill, mastering macro photography takes practice. Don’t be discouraged if your first few attempts don’t turn out the way you want them to. Keep practicing and experimenting with different techniques until you find what works best for you.
Conclusion
In conclusion, mastering macro photography can be a challenging but rewarding experience. With the right gear, technique, and approach, you can capture stunning close-up photos that reveal a whole new world of detail and texture. If you have any questions or want to share your macro photography tips and tricks, be sure to drop them in the community section on our website. Happy shooting!