Please note this post may contain affiliate links picked by me (Jay) that I have deemed may be of interest or relevant to you the reader of this.
These links do not affect the cost of the thing if you decide to purchase but i may get a little money if you choose to purchase.
For more information on my affiliate link policy click here.
They say a picture is worth a thousand words, but what if you could make that picture speak volumes? In the world of photography, the art of editing allows us to transform our raw captures into stunning masterpieces.
Whether you're a professional photographer or simply an enthusiast looking to enhance your snapshots, there's always room to elevate your photo editing skills to new heights. With these 10 game-changing techniques, you'll be able to unlock the true potential of your images and leave your audience in awe.
So, grab your mouse and let's embark on a journey that will revolutionize the way you approach photo editing. Are you ready to see your pictures come alive?
Key Takeaways
- Understanding fundamental concepts and techniques is crucial for elevating photo editing skills.
- Experimenting with different adjustments and techniques is necessary for developing a unique style.
- Utilizing layers, masks, and enhancing contrast allows for precise adjustments without affecting the original image.
- Exploring creative filters and removing unwanted elements enhances the overall quality and impact of photos.
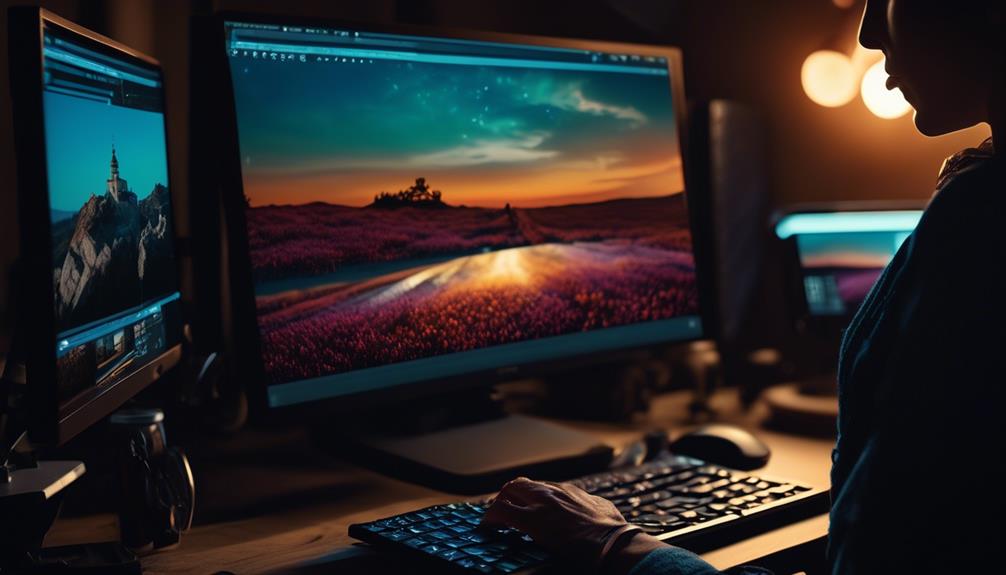
Mastering the Basics
Mastering the basics of photo editing is the key to unlocking your creative potential and transforming your images into stunning works of art. Whether you're an aspiring photographer or a seasoned professional, understanding the fundamental concepts and techniques is essential to taking your editing skills to the next level.
When it comes to photo editing, advanced retouching techniques are a game-changer. These techniques allow you to enhance and refine every aspect of your image, from removing blemishes and imperfections to adjusting colors and tones. With advanced retouching, you can bring out the true beauty of your subjects and create flawless portraits that leave a lasting impression.
Another exciting aspect of mastering the basics is the introduction to photo manipulation. This technique opens up a world of possibilities, allowing you to create surreal and imaginative scenes that defy reality. From combining multiple images to creating digital art, photo manipulation lets you unleash your creativity and tell captivating visual stories.
Understanding Color Correction
Color correction is a vital skill in photo editing that allows you to bring out the true vibrancy and accuracy of colors in your images. Understanding white balance and using gradient tools are two essential techniques that can greatly enhance your color correction abilities. Let me explain how:
- Understanding white balance:
White balance refers to the color temperature of your image. It determines whether your photo appears warm or cool. By adjusting the white balance, you can correct any color cast and ensure that whites appear truly white. This is particularly important when shooting in different lighting conditions, as each light source has a different color temperature. By understanding white balance, you can maintain the natural look of your images and create a more visually pleasing result.
- Using gradient tools:
Gradient tools are incredibly powerful when it comes to color correction. They allow you to selectively adjust the tones and hues of specific areas in your image. By applying gradients, you can enhance the colors in the sky, bring out the details in shadows, or even create a dramatic sunset effect. The key is to use gradients subtly and with precision, ensuring that the changes blend seamlessly with the rest of the image.
- Experiment and innovate:
Color correction isn't a one-size-fits-all process. It requires experimentation and innovation to achieve the desired result. Don't be afraid to play around with different adjustments and techniques. Explore new tools and workflows to push the boundaries of what's possible. By constantly learning and adapting, you can develop a unique style and take your color correction skills to the next level.
Understanding color correction is crucial for achieving stunning and true-to-life images. By mastering white balance and utilizing gradient tools, you can bring out the full potential of your photos. So, dive in, experiment, and let your creativity shine through in every color-corrected image.
Utilizing Layers and Masks
Now that we've a solid foundation in understanding color correction, let's explore the powerful techniques of utilizing layers and masks to take our photo editing skills to new heights.
Layers and masks are advanced tools that allow us to make precise adjustments and enhancements to our images. By using layers, we can stack multiple edits on top of each other, creating a non-destructive editing workflow. This means we can easily make changes to our edits without affecting the original image.
With layers, we can experiment with different adjustments and effects, trying out various combinations to achieve the desired result. We can adjust the opacity of each layer to control the intensity of the effect and even apply blending modes to create unique looks. This level of control allows us to create stunning and artistic edits that truly stand out.
Masks, on the other hand, give us the ability to selectively apply adjustments to specific areas of our image. We can use brushes or selection tools to define which parts of the image we want to modify. This precision is invaluable when working on complex images or when we want to enhance specific elements without affecting the rest of the photo.
Enhancing Contrast and Sharpening
To elevate our photo editing skills to the next level, let's delve into the art of enhancing contrast and sharpening. These techniques are essential for creating visually stunning images that grab the viewer's attention and make a lasting impression. By increasing saturation and adjusting exposure, we can bring out the true colors and details in our photos, resulting in a more vibrant and dynamic final product.
Here are three ways to enhance contrast and sharpen your images:
- Adjust the Levels: Start by adjusting the levels of your photo to improve contrast. Use the histogram tool to identify the darkest and lightest areas in the image and make adjustments accordingly. This will help bring out the shadows and highlights, adding depth and dimension to your photo.
- Use Curves: Curves are a powerful tool for enhancing contrast and fine-tuning the tonal range of your image. By creating an S-curve, you can boost the contrast while maintaining the overall balance of the photo. Adjusting the curve can make your image pop and add visual interest.
- Sharpening Techniques: Sharpening is crucial for enhancing the details in your photo. There are various sharpening techniques available, such as using the High Pass filter or the Unsharp Mask tool. Experiment with different settings to find the perfect balance between sharpening and noise reduction.
Exploring Creative Filters
Let's now explore the exciting world of creative filters, taking our photo editing skills to new heights. Creative filters offer endless possibilities to transform and enhance our images, allowing us to unleash our creativity and bring a unique touch to our photos. By using textures and overlays, we can add depth and visual interest to our images, making them more captivating and engaging.
One way to experiment with creative filters is by incorporating textures into our photos. Textures can range from subtle grain to bold patterns, and they can completely change the mood and feel of an image. By overlaying textures onto our photos, we can create a vintage, grungy, or ethereal look. It's like adding another layer of storytelling to our images, giving them a distinct and artistic character.
Another exciting aspect of creative filters is experimenting with black and white. Converting our images to black and white can evoke a sense of nostalgia, highlight textures and details, and create a timeless and dramatic effect. By adjusting the contrast and tones, we can bring out the beauty and emotions in our photos, making them more powerful and impactful.
To better understand the potential of creative filters, let's take a look at the table below:
| Creative Filter | Effect | Usage |
|---|---|---|
| Texture Overlay | Adds depth and visual interest | Portraits, landscapes, still life |
| Black and White Conversion | Creates a timeless and dramatic effect | Street photography, architecture, nature |
Removing Unwanted Elements
Removing unwanted elements from our photos is an essential skill that can greatly enhance the overall quality and impact of our images. As photographers, we strive to capture the perfect shot, but sometimes unwanted elements find their way into our frames. Luckily, with the advancements in photo editing tools, removing these distractions has become easier than ever before.
Here are three powerful techniques to help you eliminate unwanted elements and elevate your photos to new heights:
- Content aware fill: This innovative tool analyzes the surrounding pixels and intelligently fills in the selected area with content that seamlessly blends in. Whether it's removing a pesky photobomber or an unsightly object, content aware fill works like magic, leaving no trace behind.
- Clone stamp tool: This versatile tool allows you to clone a specific area of your image and blend it with another area. With careful precision, you can remove unwanted elements by replacing them with visually similar pixels from another part of the photo. The clone stamp tool is perfect for removing small imperfections or distractions that disrupt the composition.
- Healing brush tool: The healing brush tool is ideal for removing blemishes, wrinkles, or any other unwanted imperfections on your subject's skin. It samples the nearby pixels and intelligently blends them to create a seamless and natural-looking result. With just a few strokes, you can transform a flawed portrait into a flawless masterpiece.
Retouching and Portrait Editing
Retouching and portrait editing are transformative techniques that breathe life into our photographs, allowing us to enhance the natural beauty of our subjects and create stunning, captivating images. With advanced techniques and photo manipulation, we have the power to take our portraits to the next level.
When it comes to retouching, we can use various tools and techniques to remove blemishes, smooth out skin tones, and even reshape facial features. By using tools like the healing brush and clone stamp, we can seamlessly eliminate imperfections and create flawless skin. Additionally, we can adjust the brightness, contrast, and color balance to further enhance the overall look of the portrait.
Portrait editing goes beyond just retouching. It involves adding artistic elements to the image to create a specific mood or style. One popular technique is creating a soft and dreamy look by applying a blur effect to the background while keeping the subject sharp. This draws attention to the subject and adds a touch of elegance to the portrait.
Another creative technique is selectively desaturating the background, leaving the subject in full color. This technique creates a striking contrast and emphasizes the subject's presence in the photograph. It's a simple yet effective way to make the subject stand out and grab the viewer's attention.
Table:
| Advanced Techniques | Photo Manipulation |
|---|---|
| Skin Retouching | Background Blur |
| Facial Reshaping | Selective Coloring |
| Color Correction | Texture Overlay |
Working With RAW Files
Working with RAW files is an essential skill for photographers who want to have complete control over their image editing process. RAW files contain all of the unprocessed data captured by the camera's sensor, providing photographers with the flexibility to make extensive adjustments to their images.
Here are three reasons why working with RAW files can take your photo editing skills to the next level:
- Greater Dynamic Range: RAW files retain more information in the shadows and highlights, allowing you to recover more details in post-processing. This means you can rescue an underexposed image or bring back blown-out highlights, resulting in a more balanced and visually appealing photo.
- Working with Presets: RAW files offer the ability to create and apply presets, which are pre-determined adjustments that can be applied to multiple images. This saves time and ensures consistency in your editing workflow. You can create presets for different lighting conditions or styles, giving your photos a cohesive look and feel.
- Advanced Editing Techniques: RAW files provide a wide range of options for advanced editing techniques. You can adjust white balance, exposure, contrast, and color temperature with precision. Additionally, RAW files allow for non-destructive editing, meaning you can make changes without permanently altering the original image data. This gives you the freedom to experiment and refine your edits until you achieve the desired result.
Applying Special Effects
To add an extra touch of creativity and visual impact to your photos, applying special effects can elevate your editing skills to new heights. Custom presets and blending modes are two powerful techniques that can help you achieve stunning results.
Creating custom presets allows you to save your favorite editing settings and apply them to multiple photos with just a click. This not only saves you time but also ensures consistency across your images. Whether it's a vintage look, a dramatic black and white conversion, or a dreamy soft focus effect, custom presets can give your photos a unique and professional touch.
Experimenting with different blending modes is another way to enhance your photos. Blending modes determine how the pixels in one layer interact with the pixels in the layers below it. By changing the blending mode of a layer, you can create interesting and artistic effects. For example, using the 'Multiply' blending mode can darken your image, while the 'Screen' blending mode can lighten it. The 'Overlay' blending mode can add contrast and saturation, giving your photo a punchy and vibrant look.
The key to mastering special effects is to experiment and push your creativity boundaries. Don't be afraid to try new things and combine different techniques to achieve the desired result. Remember, the goal is to create photos that stand out and evoke emotions in your viewers.
Streamlining Workflow and Organization
Now let's explore how to optimize your photo editing process and keep your files organized for maximum efficiency. When it comes to improving efficiency and optimizing your workspace, there are a few key strategies that can make a significant difference in your workflow.
Here are three essential tips to help you streamline your photo editing process:
- Establish a consistent file naming convention: By giving your files clear and descriptive names, you'll be able to quickly locate and access them when needed. Consider including relevant details such as date, location, or subject matter in your file names. This simple practice will save you valuable time searching for specific images later on.
- Utilize folders and subfolders: Organizing your files into logical folders and subfolders will allow you to easily categorize and retrieve your photos. Create a folder structure that makes sense to you, based on factors such as project type, client name, or event. This method ensures that your files are neatly organized and easily accessible whenever you need them.
- Utilize keyboard shortcuts and presets: Familiarize yourself with keyboard shortcuts and create presets for commonly used editing tools or effects. This will significantly speed up your editing process and help you maintain consistency across multiple images. By reducing the time spent navigating menus and making manual adjustments, you'll be able to focus more on the creative aspects of your editing.
Implementing these strategies won't only save time but also enhance your overall editing experience. By improving efficiency and optimizing your workspace, you'll have more time to explore new techniques and push the boundaries of your creativity. So go ahead, streamline your workflow, and watch your photo editing skills soar to new heights.
Frequently Asked Questions
How Can I Effectively Remove Red-Eye From My Photos?
To effectively remove red-eye from your photos, start by selecting the red-eye tool in your photo editing software. This tool allows you to easily click and drag over the red areas in the eyes to correct them. Adjust the size and strength of the tool as needed for more precise editing.
Additionally, you can use the healing brush or clone stamp tool to further refine the area. With these techniques, you'll be able to eliminate red-eye and enhance the overall quality of your portraits.
What Are Some Commonly Used Keyboard Shortcuts for Photo Editing Software?
Keyboard shortcuts are essential for efficient photo editing. They save time and make the editing process smoother. Some commonly used shortcuts include:
- Ctrl+S for saving
- Ctrl+Z for undo
- Ctrl+C for copying
But did you know there are lesser-known shortcuts that can enhance your workflow even more? For example:
- Pressing Shift+R can rotate an image
- Ctrl+D can duplicate a layer
Learning and utilizing these shortcuts will take your photo editing skills to the next level!
How Can I Achieve a Professional-Looking Black and White Conversion?
Achieving a professional-looking black and white conversion is all about capturing the essence of the subject with smooth skin tones and a vintage vibe.
To do this, I recommend using selective adjustments to enhance the contrast and highlight the details that matter most.
Experiment with different filters and tones to find the perfect balance that brings your image to life.
With a little creativity and some editing finesse, you'll be creating stunning black and white photos that will leave everyone in awe.
What Are Some Tips for Selecting and Working With the Right Brush Tool for Retouching?
When it comes to selecting and working with the right brush tool for retouching, there are a few tips I can share.
Firstly, experiment with different brush sizes to find the one that works best for your specific needs.
Secondly, adjust the opacity and flow settings to achieve subtle and precise edits.
Lastly, make use of the healing brush tool to remove blemishes and imperfections in portraits.
These techniques, combined with adjusting exposure and contrast, will help you take your photo editing skills to the next level.
How Can I Create a Realistic-Looking Reflection in My Photos?
To create a realistic-looking reflection in your photos, start by selecting the right brush tool for retouching.
Then, add a soft focus effect to enhance the reflection's appearance.
Next, incorporate textural overlays to give it depth and dimension.
By combining these techniques, you can bring your photos to life and evoke a sense of wonder in your audience.
With a little practice and creativity, you'll be able to create stunning reflections that will amaze and inspire.
Conclusion
In the vast world of photo editing, there are endless possibilities to explore and master. Just like an artist with a paintbrush, we've the power to transform ordinary images into extraordinary works of art.
By understanding the basics, embracing creativity, and utilizing the right tools, we can unlock the full potential of our photographs.
So let's grab our virtual brushes and embark on a journey of endless creativity, where every click of the mouse brings us closer to our own masterpiece.
Happy editing!