Please note this post may contain affiliate links picked by me (Jay) that I have deemed may be of interest or relevant to you the reader of this.
These links do not affect the cost of the thing if you decide to purchase but i may get a little money if you choose to purchase.
For more information on my affiliate link policy click here.
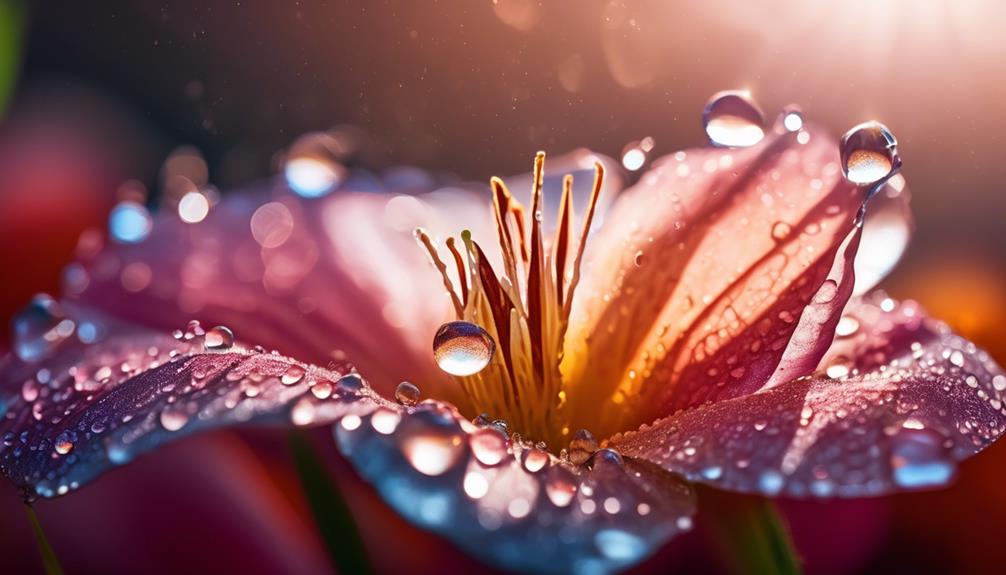
So, you've just captured a stunning close-up shot of a vibrant flower in your garden, and now you're wondering how to take your macro photography skills to the next level. Well, you're in luck! In this discussion, I'll be sharing some basic techniques that will help you elevate your macro photography game.
From choosing the right lens to mastering lighting techniques and achieving sharp focus, we'll explore the key elements that can make your macro images truly stand out.
So, grab your camera, and let's embark on a journey to unlock the secrets of capturing incredible details in the miniature world around us.
Key Takeaways
- Selecting the right macro lens is crucial for capturing intricate details of small subjects up close.
- Depth of field becomes shallow in macro photography, so investing in a macro lens with a wide aperture is essential.
- Mastering lighting techniques is essential for impactful macro shots, such as using ring lights or macro flashes for even illumination.
- Achieving sharp focus in macro images can be done through techniques like bokeh, focus stacking, and manual focus with focus peaking.
Choosing the Right Macro Lens
When it comes to capturing the intricate details of small subjects up close, choosing the right macro lens is essential. Macro photography allows us to see things we wouldn't normally notice with the naked eye. The key to achieving stunning macro shots lies in selecting the perfect lens for the job.
Macro lens selection is all about finding the right balance between magnification ratio, image quality, and versatility. The magnification ratio refers to how close the lens can focus on a subject and capture it at a life-size scale. A higher magnification ratio means you can get incredibly close to your subject and capture even the tiniest details. This is especially important when photographing small objects like flowers, insects, or jewelry.
When choosing a macro lens, it's crucial to consider the type of subjects you plan to photograph and the level of magnification you need. Some lenses offer a 1:1 ratio, meaning they can capture subjects at their actual size. Others may have a 1:2 or 1:3 ratio, which still allows for impressive close-up shots but with less magnification.
Innovative lens manufacturers are constantly pushing the boundaries of what macro lenses can do. They're creating lenses with higher magnification ratios, improved image stabilization, and faster autofocus systems. These advancements make it easier than ever to capture stunning macro shots with precision and clarity.
Understanding Depth of Field in Macro Photography
Understanding depth of field in macro photography is crucial for capturing stunning and impactful close-up shots. When shooting macro, the depth of field becomes increasingly shallow due to the close proximity of the subject. To master this aspect of macro photography, here are three key things to keep in mind:
- Macro photography equipment: Investing in a good macro lens is essential. Look for lenses with a wide aperture, such as f/2.8 or wider, as this allows for more control over depth of field. Additionally, using extension tubes or close-up filters can further enhance your macro capabilities.
- Distance and focal length: The distance between your camera and subject greatly affects the depth of field. As a general rule, the closer you're to the subject, the shallower the depth of field will be. Experiment with different focal lengths and distances to find the right balance for your desired effect.
- Macro photography post-processing techniques: While capturing the shot is important, post-processing can also play a significant role in enhancing depth of field. Techniques such as focus stacking, where multiple images with different focus points are combined, can help achieve a greater depth of field in your final image.
Mastering Lighting Techniques for Macro Shots
To capture stunning macro shots, mastering lighting techniques is essential for creating impactful and visually striking images. The right lighting can enhance the details and textures of your subject, making it stand out and come to life. When it comes to macro photography, there are several lighting setups and equipment options available to help you achieve the desired effect.
One of the most common lighting setups for macro shots is using a ring light or a macro flash. These tools provide even illumination around the subject, minimizing shadows and creating a soft, diffused light. They're especially useful when shooting small subjects up close, as they allow you to get close without casting a shadow over the subject.
Another option is using a reflector or diffuser to manipulate natural light. Reflectors bounce light onto your subject, filling in shadows and adding a touch of brightness. Diffusers, on the other hand, soften harsh sunlight by scattering the light and creating a more pleasing illumination.
Experimenting with different lighting techniques and setups will help you find the right combination for each macro shot. Don't be afraid to think outside the box and try new approaches. With the right macro lighting equipment and a bit of creativity, you can take your macro photography to new heights.
Tips for Achieving Sharp Focus in Macro Images
Now let's dive into the world of macro photography and explore some valuable tips for achieving razor-sharp focus in your macro images.
When it comes to macro photography, achieving sharp focus can be quite challenging due to the shallow depth of field. However, with the right techniques and tools, you can capture stunningly sharp and detailed macro shots.
Here are three tips to help you achieve that:
- Achieving bokeh in macro photography: Bokeh refers to the aesthetic quality of the out-of-focus areas in an image. To achieve pleasing bokeh in your macro images, use a wide aperture (low f-number) to create a shallow depth of field. This will help to separate your subject from the background, resulting in a dreamy, blurred background that enhances the focus on your main subject.
- Using focus stacking for macro images: Focus stacking is a technique that involves capturing multiple images of the same subject at different focus distances and then blending them together in post-processing. By doing so, you can achieve a greater depth of field and ensure that all parts of your subject are in sharp focus. This technique is especially useful when photographing subjects with intricate details or when using high magnification.
- Using manual focus and focus peaking: When shooting macro subjects, it's often best to switch to manual focus. This gives you complete control over what part of the image you want to be in focus. To assist with manual focusing, many cameras offer a feature called focus peaking, which highlights the areas that are in focus with colored lines or dots. Utilizing focus peaking can greatly enhance your ability to achieve precise focus in your macro images.
Exploring Creative Composition in Macro Photography
When it comes to macro photography, exploring creative composition opens up a world of endless possibilities to capture unique and captivating images.
One way to enhance your macro shots is by using creative editing techniques. Post-processing can help you emphasize certain elements, adjust colors, or create a specific mood in your images. Experiment with different editing tools and techniques to find your own style and make your macro photos stand out.
Another way to add interest to your compositions is by incorporating natural elements. Look for flowers, leaves, or other organic materials that can serve as foreground or background elements in your shots. These natural elements can bring depth, texture, and a sense of scale to your macro images. They can also help to tell a story or convey a certain emotion.
Don't be afraid to get creative and experiment with different angles, perspectives, and compositions. Remember, macro photography is all about exploring the details and capturing the beauty in the small things.
Frequently Asked Questions
What Camera Settings Should I Use for Macro Photography?
For macro photography, I usually start by setting my camera to aperture priority mode. This allows me to control the depth of field and achieve that stunning bokeh effect.
I also make sure to use a tripod to avoid any camera shake.
As for lighting, a ring light or a macro flash can help illuminate the subject and bring out the intricate details.
These camera settings and lighting techniques really bring my macro shots to life!
How Can I Avoid Camera Shake When Shooting Macro Images?
To avoid camera shake in macro photography, I've found a few tricks that work wonders.
Firstly, make sure to use a tripod or a stable surface to keep your camera steady.
Secondly, try using a remote shutter release or the self-timer function to minimize any movement caused by pressing the shutter button.
Lastly, take advantage of natural light by shooting during the golden hours when the lighting is soft and diffused.
These tips will help you achieve sharp focus and stunning macro images.
Are There Any Specific Post-Processing Techniques for Macro Photography?
When it comes to post-processing in macro photography, there are a few specific techniques that can enhance your images.
One key tip is to focus on creative composition, experimenting with different angles and perspectives to make your subjects pop.
Additionally, sharpening your images in post-processing can help achieve that crisp, detailed look that's so important in macro photography.
Don't be afraid to get creative and try new techniques to make your macros truly stand out!
What Are Some Common Challenges in Macro Photography and How Can I Overcome Them?
Overcoming lighting challenges and capturing fine details in macro shots can be a bit tricky, but I've found a few techniques that really help.
First, using a diffuser or reflector can soften harsh lighting and create a more even spread.
Second, adjusting your camera settings like aperture and ISO can make a big difference in capturing those intricate details.
Lastly, don't be afraid to experiment with different angles and perspectives to really make your macro shots stand out.
It's all about finding what works best for you and getting creative!
Are There Any Specific Accessories or Gear That Can Enhance Macro Photography?
When it comes to macro photography, having the right accessories and gear can make a world of difference.
There are a few must-have accessories for macro photography, like a good set of extension tubes or a macro lens. These can enhance your shots by allowing you to get up close and capture the finest details.
Additionally, specialized gear like a ring flash or a focus rail can take your macro photography to the next level, giving you even more creative control.
Conclusion
In conclusion, macro photography is an exciting and creative way to capture the beauty of the small world around us. By choosing the right macro lens, understanding depth of field, mastering lighting techniques, and achieving sharp focus, you can bring your macro images to life.
Remember, like a bee collecting nectar from a flower, macro photography allows us to explore and discover the hidden wonders that often go unnoticed. So grab your camera and start exploring the beauty that lies within the tiniest of details!


