Please note this post may contain affiliate links picked by me (Jay) that I have deemed may be of interest or relevant to you the reader of this.
These links do not affect the cost of the thing if you decide to purchase but i may get a little money if you choose to purchase.
For more information on my affiliate link policy click here.
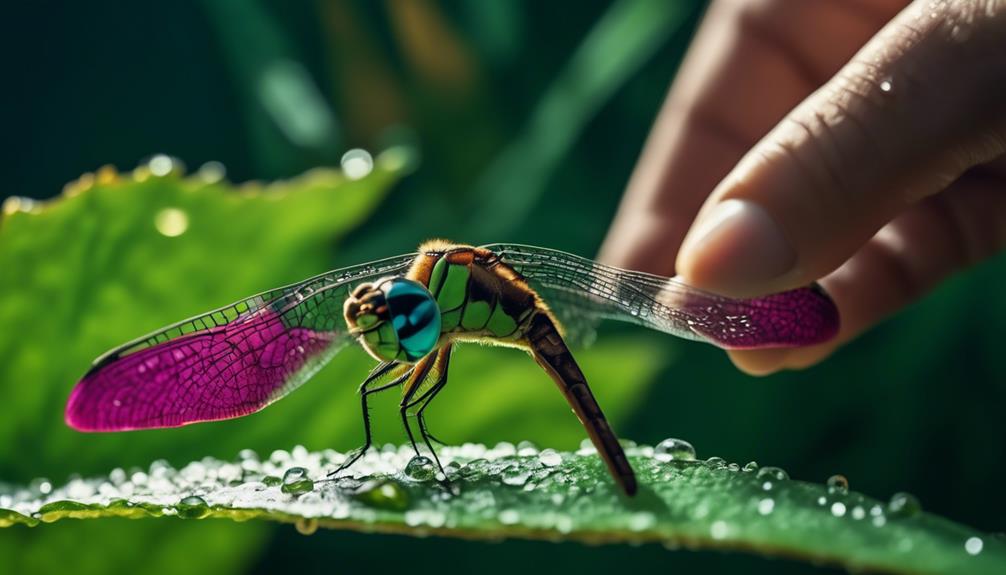
As a novice photographer, you may think that macro photography is reserved for the professionals with expensive equipment and years of experience. But let me tell you, that couldn't be further from the truth.
With the right techniques and a passion for capturing the intricate details of the world around you, anyone can dive into the fascinating world of macro photography.
So, if you're ready to unlock a whole new level of creativity and explore the hidden beauty in the tiniest of subjects, then join me as we uncover some essential macro photography techniques that will help you elevate your skills and capture breathtaking images.
Key Takeaways
- Macro lenses are designed for capturing intricate details with precision.
- Aperture determines the amount of light and depth of field in macro photography.
- Lighting is crucial for optimal exposure and highlighting details in macro photography.
- Achieving sharp focus in macro photography requires techniques such as using a tripod and experimenting with focus points.
Choosing the Right Macro Lens
When it comes to capturing stunning close-up shots, choosing the right macro lens is essential for achieving the perfect level of detail and clarity. Macro lenses are specifically designed to capture the tiniest of details with incredible precision. These lenses feature a close focusing distance, allowing you to get up close and personal with your subject.
The focal length of a macro lens also plays a crucial role in determining the level of magnification you can achieve. Longer focal lengths, such as 100mm or 180mm, are ideal for capturing tiny subjects from a distance without disturbing them. On the other hand, shorter focal lengths, like 50mm or 60mm, are more versatile and can be used for both macro and portrait photography.
When it comes to budget-friendly options, there are plenty of great choices available. Many camera manufacturers offer affordable macro lenses with excellent image quality. Additionally, third-party brands like Tamron and Sigma also produce budget-friendly macro lenses that perform exceptionally well.
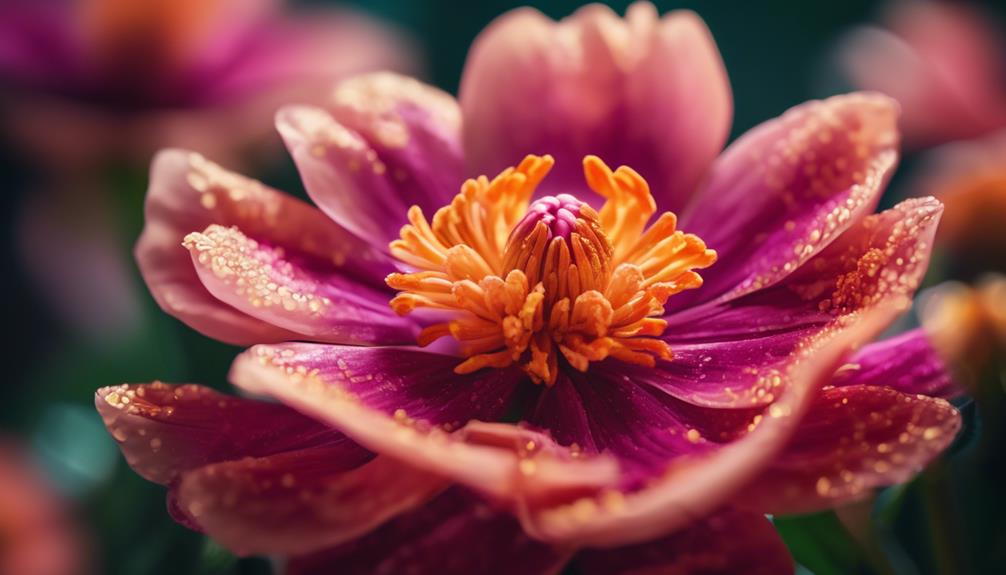
Understanding Depth of Field in Macro Photography
Understanding depth of field in macro photography is crucial for capturing breathtaking close-up images with stunning clarity and focus. It allows you to control the amount of sharpness and blur in your photos, creating a visual impact that draws the viewer's attention to the details of your subject. To help you grasp this concept, let's explore the relationship between aperture, focal length, and depth of field.
Aperture, measured in f-stops, determines the amount of light entering your camera. A wider aperture (smaller f-stop number) results in a shallower depth of field, while a narrower aperture (larger f-stop number) increases the depth of field. Focal length, on the other hand, affects the perspective and magnification of your subject. Shorter focal lengths provide a wider depth of field, while longer focal lengths create a shallower depth of field.
To better understand how these factors interact, take a look at the table below:
| Aperture (f-stop) | Shallow Depth of Field | Wide Depth of Field |
|---|---|---|
| f/1.8 | ✓ | |
| f/4 | ✓ | |
| f/11 | ✓ | |
| f/22 | ✓ |
As you can see, a wider aperture like f/1.8 produces a shallow depth of field, making your subject stand out against a beautifully blurred background. On the other hand, a narrower aperture like f/11 or f/22 creates a wider depth of field, ensuring that more of your subject is in focus.
Now that you understand depth of field in macro photography, you can experiment with different aperture settings and focal lengths to achieve creative macro photography ideas. Don't be afraid to push the boundaries and capture unique perspectives that showcase the intricate details of your subjects.
Mastering Lighting Techniques for Macro Shots
To capture stunning macro shots, mastering lighting techniques is essential for achieving optimal exposure and highlighting the intricate details of your subject. When it comes to macro photography, lighting plays a crucial role in bringing out the true beauty of your subject. Whether you're shooting in a studio or out in nature, understanding how to manipulate light can make all the difference in your final image.
One important aspect of lighting in macro photography is dealing with low light situations. When shooting in dimly lit environments, it's important to have a strategy in place to ensure that your subject is properly illuminated. You can use a variety of techniques such as using a tripod to avoid camera shake, using a higher ISO setting to increase the camera's sensitivity to light, or even using a flash to add artificial light to your composition.
Another technique to consider in macro photography is using natural light. Natural light can create a soft and diffused effect, perfect for highlighting the intricate details of your subject. Try shooting during the golden hour, which is the hour after sunrise or before sunset, when the light is warm and golden, adding a touch of magic to your macro shots. Alternatively, you can also experiment with backlighting to create a more dramatic effect, with the light shining through your subject, creating a beautiful glow.
Mastering lighting techniques in macro photography is a journey of experimentation and discovery. By understanding how different lighting conditions can affect your images, you can create stunning macro shots that truly showcase the beauty of your subject. So grab your camera, explore different lighting techniques, and let your creativity shine through your macro photography.
Tips for Achieving Sharp Focus in Macro Images
Achieving sharp focus in macro images is crucial for capturing the intricate details and beauty of your subject, allowing you to create stunning and impactful photographs. When it comes to macro photography, getting that razor-sharp focus can be a challenge. But fear not! With the right techniques and a little practice, you can maximize the details in your macro images and overcome any focusing difficulties.
Here are some tips to help you achieve sharp focus in your macro images:
- Use a tripod: A sturdy tripod will provide stability and eliminate camera shake, resulting in sharper images.
- Use manual focus: In macro photography, autofocus can sometimes struggle to lock onto the subject. Switching to manual focus allows you to have complete control and precision over the focusing process.
- Focus stacking: This technique involves taking multiple shots at different focus points and then blending them together in post-processing. It helps to ensure that all the important details in your subject are in sharp focus.
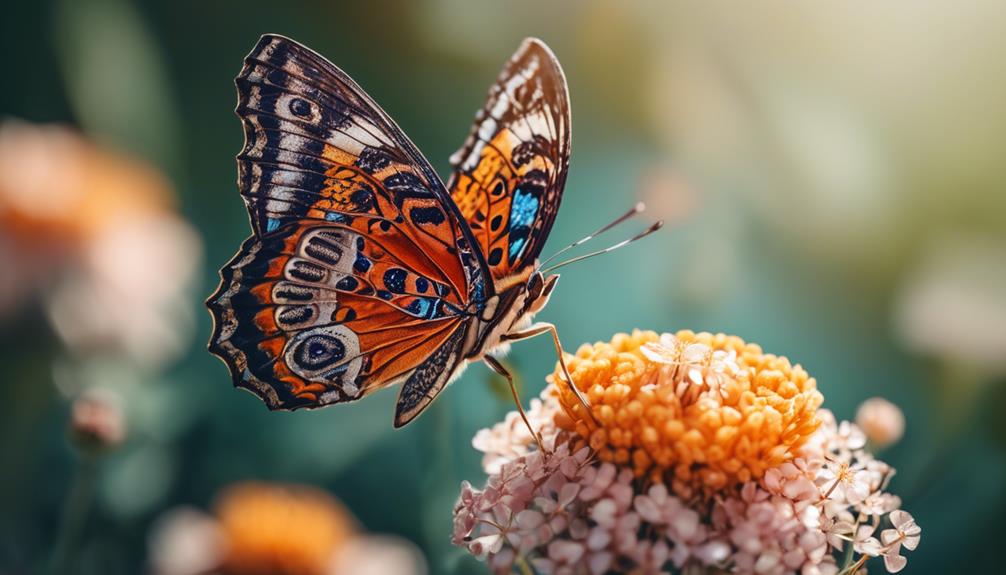
Exploring Composition Techniques for Macro Photography
Now that we've mastered the art of achieving sharp focus in macro images, let's dive into the exciting world of exploring composition techniques for macro photography.
One of the key aspects of creating visually stunning macro photographs is creative framing. By experimenting with different angles and perspectives, we can add depth and interest to our images. Don't be afraid to get up close and personal with your subject, filling the frame with captivating details. Try shooting from different heights, such as crouching down or shooting from above, to discover unique and captivating compositions.
In addition to creative framing, capturing texture is another essential element in macro photography composition. Macro lenses allow us to capture intricate details that are often overlooked by the naked eye. Take advantage of this by focusing on the textures of your subject, whether it's the delicate petals of a flower or the rough surface of a tree bark. By emphasizing the textures, you can create images that aren't only visually appealing but also evoke a tactile sensation.
Composition techniques in macro photography offer endless possibilities for creativity and innovation. By experimenting with creative framing and capturing texture, you can elevate your macro images to a whole new level. So grab your camera and start exploring the exciting world of macro photography composition!
Frequently Asked Questions
What Are Some Common Challenges Faced When Shooting Macro Photography?
When shooting macro photography, I've encountered some common challenges. One is overcoming depth of field limitations, as it can be difficult to keep the entire subject in focus. To tackle this, I experiment with different aperture settings and focus stacking techniques.
Another challenge is dealing with camera shake, which can lead to blurry images. I combat this by using a tripod, remote shutter release, or image stabilization technology.
Overcoming these challenges enhances the quality and impact of my macro shots.
Are There Any Specific Camera Settings That Are Recommended for Macro Photography?
Recommended camera settings for macro photography include:
- Using a small aperture (high f-stop) to increase depth of field
- Using a fast shutter speed to freeze motion
- Using a low ISO to reduce noise
As for lenses, prime lenses with a focal length of 50mm to 100mm are ideal for capturing detailed close-up shots.
These settings and lenses will help you capture stunning macro images with sharp focus and beautiful bokeh.
Happy shooting!
How Can I Effectively Capture the Intricate Details of Small Subjects in Macro Photography?
To effectively capture the intricate details of small subjects in macro photography, there are a few key techniques I rely on.
First, investing in the right macro photography equipment, like a dedicated macro lens or extension tubes, can make a world of difference.
Secondly, mastering the art of achieving a shallow depth of field is crucial. By using a wide aperture and focusing on a specific point of interest, you can create stunning images that highlight the fine details of your subject.
Practice and experimentation are key to achieving innovation in macro photography.
What Are Some Creative Ways to Use Lighting in Macro Photography?
When it comes to macro photography, creative lighting techniques can truly elevate your images to the next level.
One of the most exciting ways to enhance your shots is by using natural light. By strategically positioning your subject and taking advantage of the beautiful sunlight, you can create stunning effects and capture mesmerizing details.
Whether it's diffusing the light through a translucent object or experimenting with backlighting, the possibilities are endless.
Get ready to explore the world of macro photography in a whole new light!
Are There Any Post-Processing Techniques That Can Enhance Macro Images?
There are definitely some advanced editing techniques that can enhance macro images and take them to the next level.
One way is to use filters and overlays to add unique effects and textures to your photos. You can experiment with different filters to create a dreamy or dramatic look, or use overlays to add interesting elements like bokeh or light leaks.
These techniques can really make your macro shots stand out and give them a professional and artistic touch.
Conclusion
After exploring the essential macro photography techniques, I can confidently say that capturing the intricate world of tiny subjects is an exciting adventure. With the right lens, understanding depth of field, mastering lighting techniques, and achieving sharp focus, you'll be able to create stunning macro images.
Remember, composition is key, so let your creativity wander and experiment with different angles and perspectives. So, grab your camera and embark on a journey into the captivating realm of macro photography!
As they say, the tiniest details can unveil the greatest beauty.