Please note this post may contain affiliate links picked by me (Jay) that I have deemed may be of interest or relevant to you the reader of this.
These links do not affect the cost of the thing if you decide to purchase but i may get a little money if you choose to purchase.
For more information on my affiliate link policy click here.
I know what you're thinking: night photography seems daunting and challenging. Trust me, I've been there too.
But let me assure you, with the right tips and techniques, capturing stunning night-time shots can be incredibly rewarding.
In this discussion, I will share seven valuable tips that will help you excel in night photography settings.
From understanding exposure settings to mastering long exposure techniques, choosing the right equipment, and utilizing light sources effectively, we'll cover it all.
So, if you want to take your night photography skills to the next level, stick around because these tips will transform your nighttime shots into works of art.
Key Takeaways
- Understanding exposure settings, such as aperture, shutter speed, and ISO, is crucial for successful night photography.
- Choosing the right equipment, including a camera with high ISO range and a wide-angle lens, is important for capturing night scenes effectively.
- Utilizing light sources creatively, such as through light painting techniques, can enhance the visual impact of night photographs.
- Implementing composition techniques, such as using creative framing and incorporating reflections, can add depth and interest to night images.
Understanding Exposure Settings
Understanding exposure settings is crucial for capturing stunning night photographs. When it comes to night photography techniques, one of the key elements to master is finding the right exposure settings to capture those starry skies. As a photographer, I've experimented with various exposure settings to achieve the best results in my night shots. Let me share some insights on how understanding exposure settings can enhance your night photography.
Firstly, it's important to understand the exposure triangle – the relationship between aperture, shutter speed, and ISO. In low light conditions, like during night photography, a wider aperture allows more light to enter, resulting in brighter images. However, a wider aperture also means shallower depth of field, so it's essential to find the right balance based on the desired effect.
Next, the shutter speed plays a vital role in capturing starry skies. To avoid star trails, it's necessary to use a faster shutter speed. However, using a faster shutter speed also means less light is entering the camera, so finding the right balance is crucial. It's often recommended to use a tripod to stabilize the camera, allowing for longer exposures without any blurriness.
Lastly, adjusting the ISO can greatly affect the quality of your night photographs. Higher ISO settings allow for brighter images in low light conditions, but they also introduce more noise. Finding the optimal ISO setting based on the available light is essential to capture sharp and noise-free images.
Understanding exposure settings and how they interact with one another is key to capturing stunning night photographs. By mastering the exposure triangle, adjusting the aperture, shutter speed, and ISO, you can create breathtaking images of starry skies. So, grab your camera, experiment with different exposure settings, and unlock the true potential of your night photography skills.
Mastering Long Exposure Techniques
To capture stunning night photographs, mastering long exposure techniques is essential. Long exposure photography allows you to create mesmerizing images that capture the beauty of the night sky, including star trails. With the right camera settings and a few simple steps, you can achieve breathtaking results.
First, set your camera to manual mode to have full control over the exposure settings. Start by choosing a low ISO setting, such as ISO 100 or 200, to minimize noise in your images. Next, select a narrow aperture, such as f/8 or higher, to ensure a greater depth of field. This will keep both the foreground and the stars in sharp focus.
Now, it's time to set the shutter speed. For capturing star trails, you'll need a long exposure time. Start with an exposure of 30 seconds and adjust as needed. If the stars appear too dim, increase the exposure time to a minute or more. Experimentation is key to finding the perfect balance between capturing the movement of the stars and maintaining the details in the landscape.
To avoid camera shake, use a sturdy tripod and a remote shutter release or the camera's self-timer feature. This will minimize any movement that could blur your image.
Lastly, find a dark location away from light pollution, as it can interfere with capturing clear star trails. Look for clear skies and interesting foreground elements to enhance your composition.
Choosing the Right Equipment
When it comes to capturing stunning night photographs, having the right equipment is crucial. To excel in night photography settings, here are three key elements to consider when choosing the right equipment:
- Camera Selection: The first step is to choose a camera that performs well in low-light conditions. Look for a camera with a high ISO range, as this will allow you to capture detailed images even in the dark. Additionally, consider a camera with good noise reduction capabilities to ensure your night shots are clean and sharp. Mirrorless cameras are a popular choice for night photography due to their compact size, excellent low-light performance, and the ability to change lenses.
- Lens Options: Another important factor to consider is the lens you use for night photography. A wide-angle lens is ideal for capturing the expansive night sky or cityscapes. It allows you to include more of the scene in your frame, creating a sense of depth and scale. Additionally, a lens with a wide maximum aperture, such as f/1.8 or f/2.8, will let in more light, allowing for faster shutter speeds and reducing the risk of blurry images.
- Accessories: In addition to the camera and lens, there are a few accessories that can greatly enhance your night photography experience. A sturdy tripod is essential for long exposure shots, as it keeps your camera steady and prevents blur. A remote shutter release or intervalometer can also be useful, as it allows you to take photos without touching the camera, minimizing the risk of motion blur.
Utilizing Light Sources Effectively
Using various light sources strategically can elevate the quality of your night photography, adding depth, texture, and visual interest to your images. When it comes to capturing stunning night shots, it's essential to have a solid understanding of how to utilize light sources effectively.
By employing creative light painting techniques and capturing star trails effectively, you can take your night photography to the next level.
To start, let's explore creative light painting techniques. This involves using different light sources, such as flashlights, LED lights, or even sparklers, to paint or draw in the air while the camera's shutter is open. This technique allows you to add unique patterns, shapes, and colors to your images, resulting in mesmerizing light trails and captivating compositions. Experimenting with different light painting techniques can yield incredible results and add a sense of innovation to your night photography.
Another aspect to consider when utilizing light sources effectively is capturing star trails. Star trails are the beautiful arcs of light created by the movement of stars across the night sky over an extended exposure time. To capture star trails effectively, you'll need a sturdy tripod to keep your camera stable during long exposures. Additionally, using a wide-angle lens and a low ISO setting will help capture more stars and minimize noise in your images. By experimenting with different exposure times, you can create stunning star trail photos that showcase the mesmerizing movement of the night sky.
Implementing Composition Techniques
Now that you have mastered the art of utilizing light sources effectively in your night photography, it's time to explore the next crucial aspect: implementing composition techniques.
Composition plays a vital role in creating visually stunning and impactful night photographs. By using creative framing and incorporating reflections, you can take your night photography to the next level. Here are three techniques to help you achieve stunning compositions in your night shots:
- Creative Framing: Experiment with different angles and perspectives to create unique compositions. Look for interesting foreground elements that can add depth and dimension to your images. Incorporate leading lines, such as roads or buildings, to guide the viewer's eye through the photograph. Don't be afraid to get close to your subject or try unconventional framing techniques to add visual interest.
- Using Reflections: Reflections can be a powerful compositional tool in night photography. Look for reflective surfaces, such as water or glass, that can add a sense of symmetry and beauty to your images. Experiment with different angles and positions to capture captivating reflections of city lights or starry skies. You can also use puddles or wet surfaces to capture unique reflections that add a touch of creativity to your shots.
- Balancing Light and Shadows: Night photography often involves contrasting light and shadows. Use these elements to your advantage to create dramatic and captivating compositions. Play with the interplay between light and darkness to highlight your subject or create interesting silhouettes. Experiment with different exposure settings to capture the right balance between the illuminated areas and the shadows.
Managing Noise and ISO
Managing noise and ISO is an essential aspect of night photography that requires careful attention to ensure high-quality images. When shooting in low light conditions, the camera sensor tends to produce more graininess or noise, resulting in a loss of detail and sharpness in the final image. To combat this issue and achieve clean and crisp night photographs, there are a few techniques that can be employed.
Firstly, it's important to understand the relationship between ISO and noise. ISO refers to the sensitivity of the camera sensor to light. Higher ISO settings allow for faster shutter speeds but can introduce more noise. On the other hand, lower ISO settings produce less noise but require longer exposure times. Finding the right balance is key.
One technique for reducing graininess is to use the lowest possible ISO setting that still allows for a properly exposed image. This may mean using a tripod to stabilize the camera and using longer exposure times. By keeping the ISO low, the camera can capture more details in the shadows and highlights, resulting in a cleaner image.
Another technique is to shoot in RAW format. RAW files contain more data and offer greater flexibility in post-processing. This can be especially beneficial when it comes to reducing noise. Software programs such as Adobe Lightroom offer advanced noise reduction tools that can effectively remove graininess while preserving image details.
In addition, using noise reduction techniques during post-processing can further enhance the quality of night photographs. These techniques involve selectively reducing noise in specific areas of the image, such as the shadows, without affecting the overall sharpness.
Post-Processing Tips and Tricks
To enhance the visual impact of your night photographs, employing post-processing techniques can make a significant difference. After capturing stunning images in low light conditions, it's time to bring out the full potential of your shots through the power of post-processing. Here are three essential tips and tricks to take your night photography to the next level:
- HDR Processing: High Dynamic Range (HDR) processing is a technique that combines multiple exposures of the same scene to create a final image with a wider range of tones and details. This is particularly useful in night photography, where there's often a stark contrast between dark shadows and bright highlights. By blending different exposures, you can achieve a more balanced and visually striking result. Experiment with HDR software or use the built-in HDR feature in your editing software to create stunning night images with enhanced dynamic range.
- Color Grading Techniques: When it comes to night photography, colors play a crucial role in setting the mood and conveying the atmosphere of the scene. Color grading allows you to manipulate the colors in your photographs to create a specific look or feel. Experiment with different color grading techniques to enhance the vibrancy of the night sky, add warmth to city lights, or create a moody and mysterious ambiance. Play with the color balance, saturation, and hue to achieve the desired effect and make your night photographs truly stand out.
- Noise Reduction: Night photography often involves shooting at high ISO settings, which can introduce unwanted noise in your images. To minimize this noise and maintain image quality, use noise reduction tools during post-processing. These tools can help preserve details while reducing noise, resulting in cleaner and sharper night photographs. Experiment with different noise reduction techniques and find the balance between noise reduction and retaining important details.
Frequently Asked Questions
How Can I Capture Star Trails in My Night Photography?
To capture stunning star trails in my night photography, I employ a few key techniques.
First, I set my camera to a long exposure time, allowing the stars to create beautiful streaks across the sky.
I also use a sturdy tripod to keep my camera steady during the lengthier exposures.
After capturing the images, I enhance the star trails in post-processing using techniques like stacking multiple images and adjusting the contrast.
These techniques result in breathtaking star trail photographs that truly stand out.
What Are Some Tips for Photographing the Milky Way?
To capture the beauty of the Milky Way in your night photography, it's essential to find the best locations and effectively use long exposure. Finding dark places away from light pollution will enhance the visibility of the Milky Way.
Experimenting with different shutter speeds and ISO settings will help you achieve stunning results. Don't be afraid to push the boundaries and try new techniques to capture the essence of the night sky.
The Milky Way awaits your innovation and creativity.
Are There Any Specific Camera Settings to Use When Shooting Fireworks at Night?
When shooting fireworks at night, there are some specific camera settings and techniques that can help you capture stunning images.
First, set your camera to manual mode to have full control over the settings.
Use a tripod to keep your camera steady and avoid blur.
Adjust your ISO to a low value to reduce noise.
Set a wide aperture to allow more light into the camera.
Finally, use a longer shutter speed to capture the trails of the fireworks.
These tips will surely help you excel in capturing the beauty of fireworks at night.
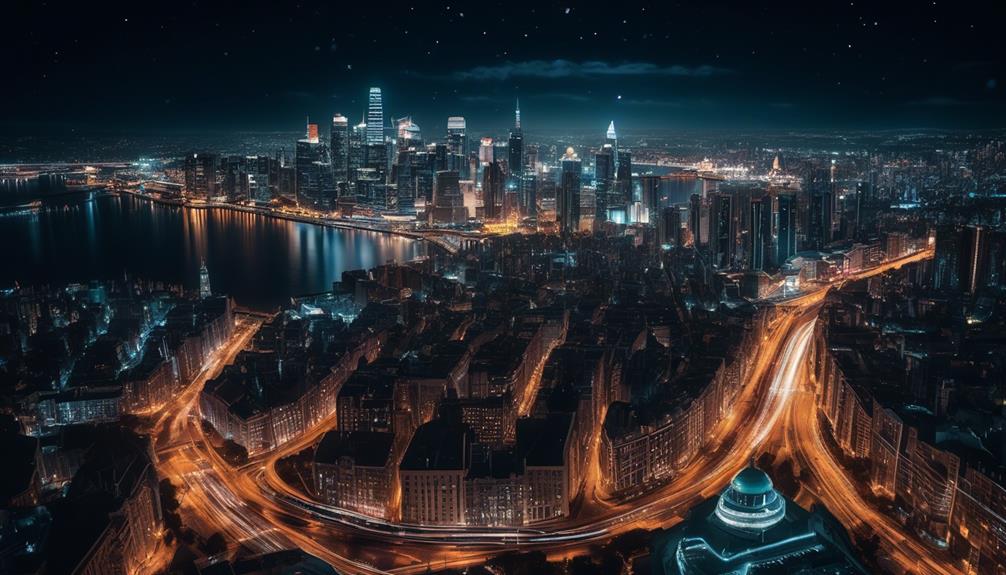
How Can I Capture the Beauty of City Lights at Night Without Overexposing the Image?
To capture the beauty of city lights at night without overexposing the image, there are a few tips I've learned.
First, using long exposure is key. By keeping the shutter open for a longer period, you can capture the light trails and create a stunning effect.
Second, adjust your camera's ISO to a lower setting to reduce noise.
Lastly, experiment with different aperture settings to find the right balance between exposure and depth of field.
These tips have helped me create amazing night cityscape shots!
What Are Some Techniques for Capturing the Movement of Car Lights in My Night Photography?
To capture the mesmerizing movement of car lights in my night photography, I rely on long exposure techniques. By using a slow shutter speed, I can create beautiful light trails that add a sense of motion and energy to my images.
To achieve this, I set my camera on a stable surface or tripod, choose a longer exposure time, and use a low ISO setting.
The result is stunning photographs that showcase the dynamic nature of city streets at night.
Conclusion
In the captivating realm of night photography, mastering exposure settings, utilizing light sources effectively, and implementing composition techniques are just a few of the key elements to excel in this art form.
With the right equipment and a dash of creativity, you can create stunning images that bring the darkness to life.
So, venture into the night, embrace the challenges, and let your imagination sparkle.
Remember, the night is your canvas, waiting for your artistic touch to illuminate its beauty.


