Please note this post may contain affiliate links picked by me (Jay) that I have deemed may be of interest or relevant to you the reader of this.
These links do not affect the cost of the thing if you decide to purchase but i may get a little money if you choose to purchase.
For more information on my affiliate link policy click here.
As they say, a cluttered desk is a sign of a cluttered mind, and the same goes for a photography studio. I've learned through my years behind the lens that an organized space is critical to not only the efficiency of my work but also the creativity that flows within it.
In this guide, I'm eager to share with you 11 key tips I've honed to transform any studio into a well-oiled machine, from smart storage solutions that keep gear at your fingertips to workflow stations that streamline your process.
But organizing a studio isn't just about efficiency; it's about creating an environment that inspires and facilitates your best work. Stick with me, and I'll reveal how to craft a space that not only sparks creativity but also impresses clients the moment they step in.
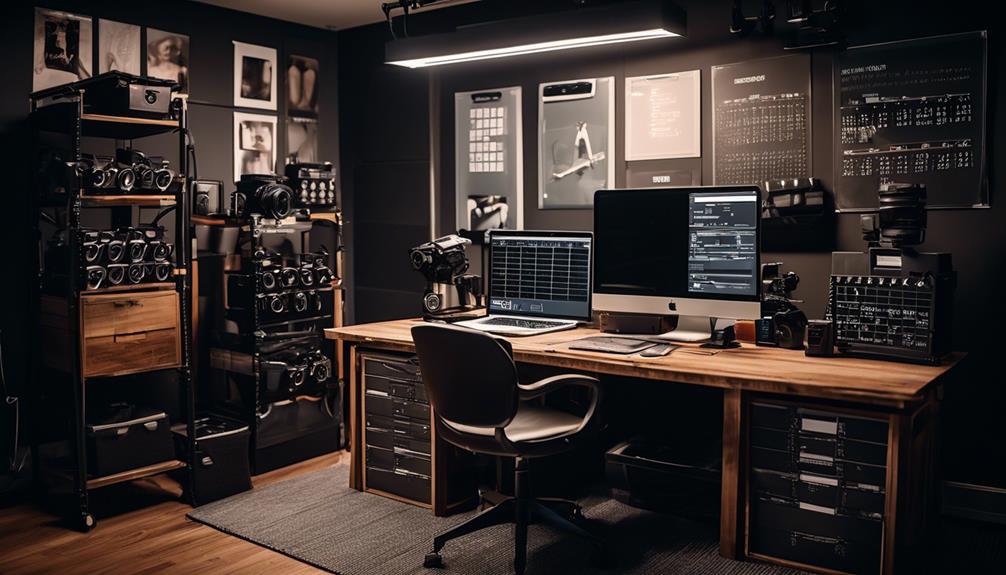
Assess Your Space

Before diving into the creative whirlwind of setting up your studio, let's take a critical look at the space you have to ensure it meets your photographic needs. The right space layout is the bedrock of a functional studio—it's where the magic happens! So, I'm here to help you envision a studio that not only sparks creativity but also maximizes productivity.
First up, consider the flow of your workspace. You'll need enough room to move around comfortably, without tripping over cables or knocking over lights. I like to sketch a rough floor plan, visualizing where each piece of equipment will live. And remember, flexibility is key! Modular setups can adapt to different photoshoots, giving you the freedom to innovate on the fly.
Now, let's chat about lighting considerations—absolutely crucial, right? Natural light can be a photographer's best friend or fickle foe, so understanding how it changes throughout the day is essential. If your space has windows, fantastic! But it's also important to plan for consistent, controllable artificial lighting. I always suggest a mix of both, allowing for versatility no matter the time or weather.
With these tips, you're on your way to a photography studio that's as cutting-edge as your vision!
Implement Efficient Storage
How can you transform clutter into clarity? Efficient storage solutions are the backbone of any well-organized photography studio. I've discovered that space saving racks and modular shelving can revolutionize the way I store my gear, props, and backdrops. It's all about maximizing my space while keeping everything easily accessible. Here's how I do it:
- Space Saving Racks: These are lifesavers for housing my tripods, light stands, and boom poles. By mounting these racks on walls or ceilings, I've freed up so much floor space—it's like I've expanded my studio without knocking down walls!
- Modular Shelving: I adore the flexibility these units offer. I can customize the shelving to fit various equipment sizes, and it's a breeze to reconfigure as my studio's needs evolve.
- Cable Management Solutions: I use a combination of hooks and cable ties to keep cords neatly organized and off the floor. This not only looks cleaner but also prevents tripping hazards.
- Labeled Bins and Containers: Everything has its place, and when I'm in the thick of a shoot, I can find what I need without a second thought.
Staying organized isn't just about tidiness; it's about creating a flow that allows creativity to thrive. With an innovative approach to storage, I'm always ready for the next great shot!
Maintain an Equipment Checklist

I've found that keeping a meticulous equipment checklist is a game-changer for any photography studio!
It's not just about knowing what's in stock; it's about staying on top of my gear's condition with regular audits.
Let's explore how inventory management systems can streamline this critical task, ensuring nothing slips through the cracks!
Inventory Management Systems
To keep your photography studio running like a well-oiled machine, it's crucial to implement an inventory management system that includes a comprehensive equipment checklist. Embracing digital catalogs allows me to visualize my gear virtually, and barcode tracking ensures precision in managing my assets. Here's how I stay on top of my game:
- Digitize Everything: Convert my physical inventory into a digital catalog to access it anywhere, anytime.
- Barcode Brilliance: Attach barcodes to equipment for quick scanning and tracking.
- Check and Double-Check: Regularly update my checklist after each shoot to account for all items.
- Stay Alert: Set up notifications for maintenance or when it's time to upgrade.
This system not only saves time but also infuses my workflow with the innovation my clients expect!
Regular Equipment Audits
Regularly auditing your photography equipment is essential to ensure every piece is accounted for, in top condition, and ready for action. Keeping tabs on your gear not only maximizes equipment lifespan but also sparks innovation by highlighting potential upgrades or creative tools you might have overlooked. Imagine the confidence I feel stepping into a shoot knowing my gear is primed and my inventory is meticulous!
Here's a snapshot of my audit checklist:
| Equipment Category | Audit Frequency |
|---|---|
| Cameras & Lenses | Monthly |
| Lighting Gear | Bi-Monthly |
| Miscellaneous | Quarterly |
This table keeps me on track and ensures that no item slips through the cracks. It's a game-changer, really. By staying proactive, I'm always ready for that next creative challenge!
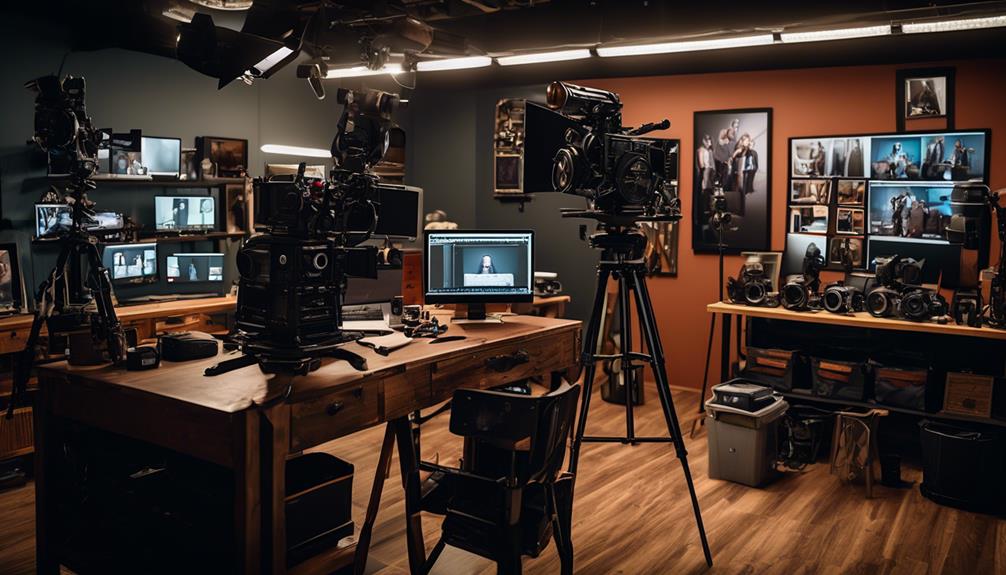
Create Workflow Stations
Designing dedicated workflow stations in your photography studio will streamline your creative process, allowing for a more efficient and organized environment. I can't stress enough how important studio ergonomics and proper lighting zones are for boosting productivity. By thoughtfully arranging your space, you're not just creating a place to work; you're crafting an innovation hub where every tool is at your fingertips, and every light source enhances your creative vision.
Here are four essential stations I've set up in my studio to maximize efficiency:
- Capture Zone: A clutter-free space with adjustable lighting zones, ensuring the perfect shot regardless of the subject.
- Editing Suite: Ergonomically designed for comfort during long editing sessions, equipped with calibrated monitors for color accuracy.
- Client Lounge: A welcoming area for client consultations, fostering a collaborative atmosphere.
- Gear Storage: An organized system for equipment, allowing for quick changes and maintenance, streamlining the transition between shoots.
Each station is a cog in the well-oiled machine that's my studio. By keeping these areas distinct yet seamlessly integrated, I've crafted a space that's not just about taking photos—it's about creating art with efficiency and flair.
Invest in Quality Furniture

Investing in high-quality furniture isn't just a luxury; it's a strategic move that pays dividends in comfort and productivity for any photography studio. I've found that ergonomic design in seating and desks isn't just buzzworthy—it's crucial for those long editing sessions where your posture can really take a hit.
A chair that supports my back and a desk at the right height keep me in the zone, free from the distractions of discomfort.
And let's not underestimate the power of color coordination within a studio space. It's not merely about aesthetics; it's about creating a cohesive and inspiring environment that fuels creativity and impresses clients. I choose furniture that complements my studio's color scheme, which not only looks fantastic but also subtly reinforces my brand identity.
Moreover, investing in durable, well-made pieces means I'm not constantly replacing items that can't keep up with the demands of a bustling studio. I prefer pieces that are both functional and have that wow factor, ensuring my workspace is as innovative and cutting-edge as the photography I produce.
Trust me, the right furniture is more than an expense—it's an investment in the heart and soul of your creative space.
Utilize Wall Space
Maximizing wall space in your photography studio can transform it from cluttered to streamlined, offering both practical storage solutions and opportunities for creative displays. As I've reimagined my own space, I've realized that the walls aren't just boundaries—they're a canvas for innovation.
Let's dive into some smart ways to make your walls work harder for you.
Here's my take on utilizing wall space effectively:
- Install Space Saving Shelves: Opt for floating shelves that blend with your studio's aesthetic. They'll hold cameras, lenses, and props without eating into your floor space.
- Use Vertical Racks: Keep backdrops and light stands tidy with vertical racks. Not only do they save space, but they also make it easier to see all your options at a glance.
- Create a Pegboard System: This customizable solution is perfect for hanging smaller gear, cables, and even framed prints. It's a dynamic tool that can evolve with your changing needs.
- Display Your Work: Dedicate an area for your best pieces. This inspires clients and showcases your style. Plus, it's a fantastic conversation starter!
I'm always looking for ways to enhance my studio's functionality and aesthetics. These ideas have been game-changers in maximizing my creative environment.
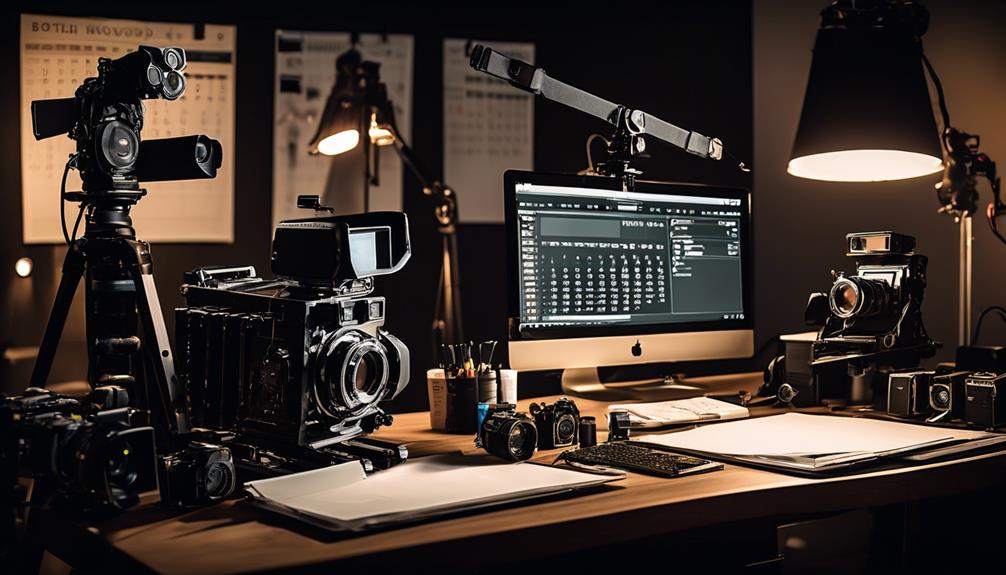
Streamline Editing Setups

Now, let's tackle the heart of post-production: streamlining our editing setups!
I'll show you how to revamp your editing workflow, ensuring you're not just effective, but also enjoying the process.
We'll also cover the must-have tools that'll make your life easier and tips for managing files like a pro, so you can spend more time shooting and less time clicking.
Optimize Editing Workflow
Streamlining your editing setup is a game-changer, dramatically boosting efficiency and allowing more time to focus on the creative aspects of photography. Here's how I optimize my editing workflow, ensuring I'm at the forefront of innovation:
- Color Calibration Tools: I use sophisticated color calibration tools to maintain true-to-life colors, which is crucial for delivering consistent quality.
- Efficient Backup Solutions: I've implemented automated backup solutions to safeguard my work, so I never skip a beat.
- Custom Presets and Macros: Crafting my own presets and macros speeds up editing without compromising on uniqueness.
- Dual Monitors: Utilizing dual monitors enables me to compare edits side-by-side, refining my process even further.
Essential Editing Tools
To truly elevate my photo editing, I've equipped my studio with a suite of essential tools that transform raw images into works of art with remarkable efficiency. From top-of-the-line color calibration devices ensuring perfect hues to the latest software updates that keep my tools sharp and innovative, I'm always at the forefront of photo editing technology.
Here's a glimpse at my streamlined setup:
| Essential Tools | Function |
|---|---|
| Color Calibration Unit | Guarantees accurate color representation |
| Advanced Editing Suite | Offers cutting-edge editing capabilities |
| High-Performance CPU | Ensures swift processing of high-res images |
Staying updated with these innovations not only makes my workflow smoother but also sharpens my competitive edge in this dynamic field. Embracing these advancements, I'm crafting visual stories that are as technically sound as they are captivating.
Efficient File Management
Harnessing the power of efficient file management systems, I've revolutionized my editing process, making it faster and more intuitive than ever before. By integrating digital backups and metadata tagging into my workflow, I ensure that every file is both secure and easily searchable.
Here's how:
- Consistent Folder Structures: I create a logical folder hierarchy that makes navigation a breeze.
- File Naming Conventions: Each file is named methodically to avoid confusion and streamline retrieval.
- Regular Digital Backups: I perform scheduled backups to multiple locations, safeguarding my work against loss.
- Metadata Tagging: With detailed metadata, I can quickly find any photo by keywords, ratings, or camera settings.
Organize Props Systematically

While setting up my photography studio, I've learned that systematically organizing props is key to a smooth and efficient workflow. I can't stress enough how prop labeling and theme categorization have revolutionized my creative space! Each prop bears a clear, easy-to-read label that not only shouts its identity but also hints at which theme it belongs to. This might sound like a small step, but it's a giant leap in prop management!
Imagine this: You're in the zone, your client's expecting that perfect vintage vibe, and boom – you know exactly where to find that classic rotary phone and the retro suitcases because your props are categorized by era. It's not just about saving time; it's about keeping the creative juices flowing without the hiccup of a messy search.
Adopting an innovative prop organization system has been a game-changer. I've got shelves sorted by themes like 'Wedding Bliss', 'Corporate Clean', and 'Fantasy Land'. It's a visually appealing and practical setup that makes prop selection a breeze. Plus, it impresses clients who peek behind the scenes. They see a professional who values order and creativity, and that's a picture worth a thousand words.
Keep a Clean Environment
Now, let's tackle the key to any successful studio: maintaining a spotless space!
I've found that sticking to a regular cleaning schedule not only keeps the studio inviting but also boosts productivity.
And believe me, nothing hampers creativity like a cluttered workspace, so let's talk essentials for keeping things tidy and functional!
Regular Cleaning Schedule
To maintain a photography studio that practically sparkles, I make it a point to adhere to a strict cleaning schedule, ensuring that every corner is ready for creativity to thrive. Dust accumulation isn't just an eyesore; it can also affect my equipment's performance. That's why I've established a cleaning routine that's as innovative as the shoots I host:
- Weekly Dusting: Every Monday, I tackle dust on surfaces and gear, keeping the environment immaculate.
- Daily Sanitization: Post-shoot, I follow sanitization protocols, ensuring a germ-free space for my clients.
- Monthly Deep Clean: I set aside a day to deep clean, reaching those often-missed spots.
- Clutter Check: Each evening, I declutter, because a tidy studio is a productive studio!
A clean studio is the canvas for my art, and I'm zealous about keeping it pristine.
Clutter-Free Workspace Essentials
Maintaining a clutter-free workspace is crucial for fostering a creative and productive atmosphere in my photography studio. Goodbye chaos, hello creativity! With the perfect blend of workspace lighting and decorative touches, I've curated an environment that not only inspires but also streamlines my workflow.
Here's a quick peek at the essentials that keep my studio in top shape:
| Essentials | Function | Impact on Creativity |
|---|---|---|
| Organized Shelving | Storage | Reduces Distractions |
| Sleek Desk | Work Surface | Enhances Focus |
| Smart Lighting | Optimal Illumination | Sets the Mood |
Each element adds a spark of innovation and keeps the clutter at bay. I've learned that a well-lit, aesthetically pleasing space isn't just visually appealing—it's a productivity powerhouse!
Manage Cables and Wires

Untangling the mess of cables and wires is a key step in streamlining your photography studio for efficiency and safety. I've found that a well-organized cable system not only reduces trip hazards but also transforms the studio into a more productive space.
Here's my go-to strategy:
- Use Cable Labels: I can't stress enough how much time I save by using cable labels. It's a game-changer for quickly identifying which wire powers what gear.
- Employ Velcro Straps: These little wonders make it easy to adjust and reorganize cables without the sticky residue or frustration that comes with traditional tape.
- Implement Cable Management Tracks: I've installed these along the studio's walls and under desks. They keep cables off the floor and maintain a sleek, professional look.
- Schedule Regular Cable Audits: Once a month, I take an hour to check all the cables. This routine ensures everything is properly connected and gives me a chance to replace or reorganize as needed.
I'm all about finding innovative solutions that make my workspace more efficient and my workflow smoother. Managing cables might seem mundane, but it's truly the unsung hero of a well-oiled photography studio.
Schedule Regular Maintenance
Regular maintenance is the heartbeat of a thriving photography studio, ensuring every piece of equipment performs at its best when it matters most. I can't overstate the importance of setting a schedule to keep everything in tip-top shape. It's like giving your studio a health check-up; you wouldn't want to skip that, would you?
Now, let's dive into the nitty-gritty. Lighting upkeep isn't just about replacing a bulb when it flickers out—it's about ensuring the quality of light remains consistent across all shoots. I follow a meticulous plan to check and clean my lights, diffusers, and reflectors.
Safety inspections are equally crucial. I make it my mission to ensure that every cable is secure and every stand is stable. After all, a safe studio is a productive studio. Here's a quick table to break down my maintenance routine:
| Maintenance Task | Frequency |
|---|---|
| Lighting Equipment Check | Monthly |
| Safety Inspections | Bi-Monthly |
| Software Updates | As Released |
| General Cleaning | Weekly |
Staying on top of these tasks keeps my studio running smoothly, allowing me to focus on what I love most—creating stunning images. Remember, a well-oiled machine is the key to innovation!
Frequently Asked Questions
How Do I Handle Client Consultations and Sales Meetings in My Photography Studio?
To ace my client consultations and sales meetings, I've jazzed up my approach!
I advise clients on attire that'll pop in their photos and experiment with dynamic lighting setups to showcase my work's vibe.
By keeping the energy up and staying on the cutting edge, I make sure each meeting not only informs but truly excites.
It's all about creating an innovative and engaging experience that turns consultations into booked sessions!
What Are the Best Practices for Managing Client Data and Privacy Within the Studio?
For managing client data and privacy, I'm all about best practices! I've embraced data encryption to protect my clients' sensitive information. It's a game-changer, ensuring everything's locked tight.
Plus, I'm big on privacy training. It keeps me sharp on the latest protocols, so my clients can trust their secrets are safe with me.
Staying ahead with these innovative strategies gives my studio the edge in safeguarding client privacy. It's a top priority!
How Can I Create a Versatile Studio Space That Accommodates Different Photography Genres?
Why settle for a one-trick studio when you can have it all?
I'm creating a versatile space by focusing on backdrop versatility and lighting flexibility.
By using interchangeable backdrops and a range of lighting options, I can switch from moody portraits to vibrant product shots in a snap.
It's all about adapting quickly to client needs—keeping my studio innovative, dynamic, and always ready for whatever shoot comes next!
Are There Any Recommended Software Tools or Apps to Help With Studio Scheduling and Booking?
Absolutely, I've found some fantastic software tools that streamline studio scheduling and booking. They're lifesavers for managing my studio inventory and keeping tabs on equipment maintenance.
Using these apps, I'm always ahead of the game, ensuring my gear is in tip-top shape for every shoot. It's like having a personal assistant in my pocket!
These innovative solutions have seriously boosted my studio's efficiency and my own peace of mind.
What Strategies Can I Use to Market My Photography Studio to Attract New Clients?
Imagine capturing not just photos, but a bustling client base!
I'm leveraging social media to showcase my unique style and engage with potential clients.
By crafting compelling email campaigns, I'm directly reaching out to photography enthusiasts, offering them a glimpse into my creative world.
It's an exciting time, as I embrace innovation to market my studio, ensuring every snap, post, and email puts my brand in the limelight, ready to attract new clients.
Conclusion
And there you have it, my personal blueprint for a studio that doesn't just function—it thrives.
But remember, this is just the beginning. The real magic happens when you breathe life into your space.
Every shoot, every click of the shutter is a chance to refine your process. So stay alert, adapt, and watch as your studio transforms from mere workspace to a cradle of creativity.
The next masterpiece? It's waiting to be captured, right here, by you.