Please note this post may contain affiliate links picked by me (Jay) that I have deemed may be of interest or relevant to you the reader of this.
These links do not affect the cost of the thing if you decide to purchase but i may get a little money if you choose to purchase.
For more information on my affiliate link policy click here.
As a passionate photographer, capturing breathtaking golden hour photos is a pursuit that fills me with excitement and anticipation. The soft, warm light that bathes the world during this magical time creates a truly mesmerizing atmosphere, perfect for capturing stunning images.
But how can you make the most of this fleeting moment? Fear not, for I have gathered nine invaluable tips that will elevate your golden hour photography to new heights.
From mastering the best camera settings to incorporating natural elements and experimenting with composition, each tip will unlock a new dimension of beauty in your photographs.
So, grab your camera and join me on this captivating journey through the golden hour, where every click of the shutter reveals a world of breathtaking possibilities.
Key Takeaways
- Planning ahead and arriving early to the location during the Golden Hour allows for finding the perfect spot and experimenting with different angles and framing techniques.
- Adjusting camera settings, such as using a wide aperture and slower shutter speed, can enhance the magical and captivating golden light.
- Choosing the right location with open spaces and minimal obstruction optimizes the lighting conditions and incorporating elements of nature, architecture, or human subjects adds depth and interest to the photos.
- Creating silhouettes, utilizing shadows, and capturing reflections can add drama, dimension, and visual interest to the images during the Golden Hour.
Understanding the Golden Hour
During the Golden Hour, the world transforms into a breathtaking canvas of warm, soft light that ignites a fire within me as a photographer. The Golden Hour, also known as the Magic Hour, refers to the period shortly after sunrise or before sunset when the light is at its most magical and captivating. It's a time when the sun is low in the sky, casting a beautiful golden glow that adds a touch of enchantment to any scene. As a photographer, understanding and harnessing the power of the Golden Hour is essential for capturing stunning and evocative images.
To make the most of the soft light of the Golden Hour, there are a few techniques that can elevate your photography to new heights. First and foremost, it's important to plan ahead and know exactly when the Golden Hour will occur. There are numerous smartphone apps and websites that can provide you with the precise times for sunrise and sunset in your location. By being prepared and arriving early, you can scout the area and find the perfect spot to capture the golden light.
Once you have found the ideal location, it's time to consider composition. The soft, warm light of the Golden Hour can enhance the beauty of any subject, so think about how you can incorporate it into your frame. Experiment with different angles, perspectives, and framing techniques to create visually compelling images.
Additionally, it's crucial to pay attention to the quality of light during the Golden Hour. The low angle of the sun creates long shadows and adds depth and dimension to your photographs. Look for interesting patterns, textures, and shapes that can be accentuated by the soft light.
Best Camera Settings for Golden Hour
To capture the true essence of the Golden Hour, it's essential to dial in the best camera settings that will bring out the magic and enchantment of this exquisite light. As a passionate photographer who's spent countless hours chasing the perfect Golden Hour shot, I've discovered a few camera settings that never fail to deliver stunning results.
Here are three settings that will help you capture breathtaking Golden Hour photos:
- Aperture: Set your aperture to a wide opening, around f/2.8 or even wider if your camera allows. This will create a shallow depth of field, allowing the beautiful golden light to softly wrap around your subject, creating a dreamy and romantic atmosphere.
- Shutter speed: The Golden Hour light is often soft and diffused, which means you can use a slower shutter speed to capture more light. Experiment with longer exposures, around 1/30th of a second or slower, to create a sense of movement and blur in your images, adding a touch of ethereal beauty.
- White balance: The warm, golden tones of the Golden Hour light are what make it so captivating. To ensure these tones are accurately represented in your photos, set your white balance to the 'Cloudy' or 'Shade' setting. This will enhance the warmth and richness of the light, giving your images a natural and inviting feel.
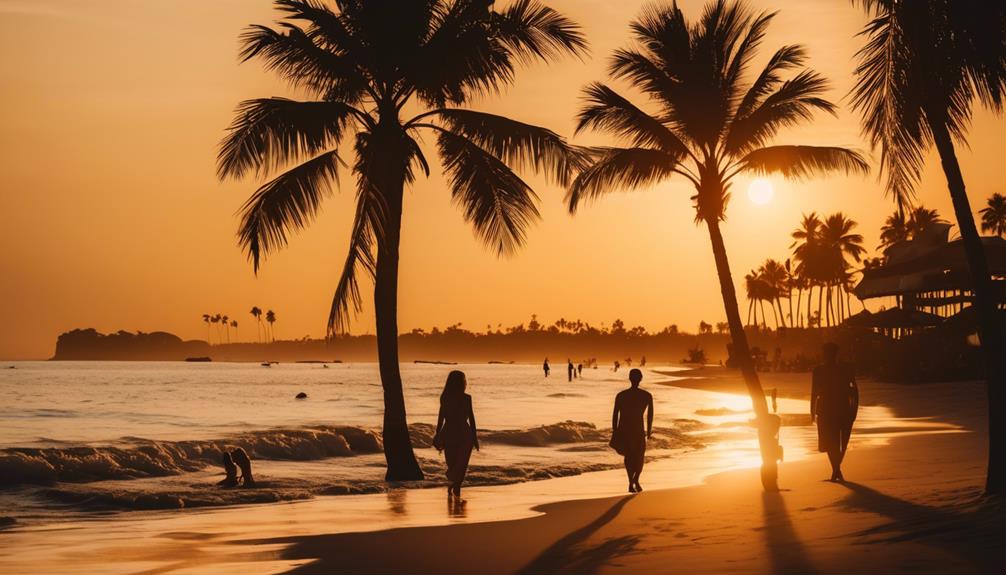
Choosing the Right Location
With my deep passion for capturing the beauty of the Golden Hour, I've learned that choosing the perfect location is crucial for achieving truly mesmerizing photographs. Finding the perfect spot to shoot during this magical time of day can make all the difference in the world.
As a photographer, I've spent countless hours exploring various locations, searching for that ideal backdrop that perfectly complements the warm, golden light that bathes the surroundings.
When it comes to choosing the right location for Golden Hour photography, it's essential to consider the overall aesthetic and mood you want to convey in your images. Are you looking for a serene, natural setting with rolling hills and vibrant flowers? Or perhaps an urban landscape with towering buildings and bustling streets? Whatever your preference, there are endless possibilities to explore.
In addition to the visual appeal, another crucial factor to consider is optimizing lighting conditions. During the Golden Hour, the sun is lower in the sky, creating soft, warm light that casts a beautiful glow on everything it touches. Look for locations that have open spaces with minimal obstruction, allowing the light to spread evenly and create a harmonious atmosphere. A beach or a wide-open field are excellent choices as they provide ample space for the light to work its magic.
When scouting for locations, don't be afraid to think outside the box. Look for unique perspectives and angles that will set your photos apart from the rest. Consider incorporating elements of nature, architecture, or even human subjects to add depth and interest to your compositions. Embrace innovation and experiment with different locations to find the ones that inspire you and ignite your creativity.
Using Natural Elements to Enhance Your Photos
Enhancing your Golden Hour photos with natural elements is a surefire way to create captivating and breathtaking images. The beauty of nature can add depth, richness, and a sense of wonder to your photographs. Here are three ways to utilize foliage and incorporate natural textures to take your Golden Hour photos to the next level:
- Embrace the Green: Use lush foliage as a frame, foreground, or backdrop to create a vibrant and dynamic composition. Whether it's a canopy of trees, a field of wildflowers, or a cluster of leaves, the natural greenery will add a burst of life and freshness to your images. It creates a sense of connection to the environment and evokes a feeling of tranquility in the viewer.
- Play with Textures: Look for interesting natural textures, such as rough tree bark, smooth pebbles, or delicate petals, to add visual interest and depth to your photos. These textures provide a tactile quality that can make your images feel more tangible and immersive. Experiment with different angles and lighting conditions to highlight the unique textures and create a sense of touch through the visual medium.
- Go Macro: Explore the world of small details by getting up close and personal with nature. Capture the intricate patterns of leaves, the delicate veins of petals, or the rough edges of a pinecone. By focusing on these minute details, you can reveal the beauty and complexity that often goes unnoticed. This approach adds a sense of intimacy and wonder to your photos, inviting viewers to appreciate the intricacies of the natural world.
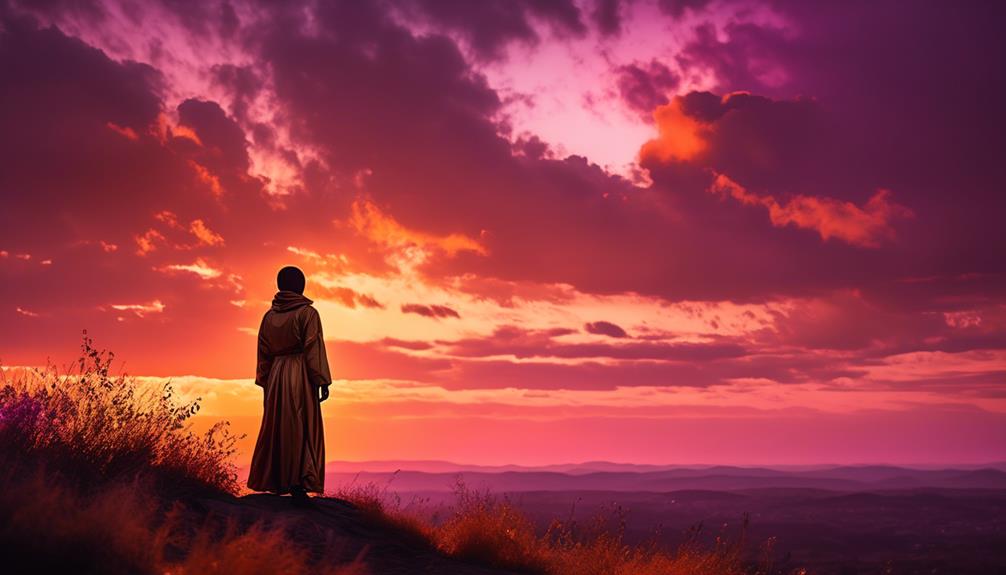
Incorporating Silhouettes and Shadows
As we continue to explore the world of Golden Hour photography, we can now turn our attention to the captivating realm of incorporating silhouettes and shadows, where the interplay between light and darkness creates a striking and dramatic visual narrative.
Silhouettes are a powerful technique that adds depth and mystery to your photographs. By placing your subject against a bright and vibrant background, you can create a stunning contrast between the dark silhouette and the warm, golden hues of the setting sun. This contrast not only adds drama to your images but also emphasizes the shape and form of your subject.
To create a powerful silhouette, position your subject in front of the light source, such as the setting sun, and expose for the brighter background. This will result in your subject being underexposed, creating a strong and defined silhouette. Experiment with different angles and poses to find the most interesting shapes and compositions.
Shadow play is another technique that can add intrigue and depth to your Golden Hour photos. The long and soft shadows cast during this time of day can create interesting patterns and textures, adding visual interest to your images. Look for objects or elements that cast intriguing shadows and use them to enhance your composition. Play with the angles and placement of the shadows to create dynamic and visually engaging photographs.
Incorporating silhouettes and shadows into your Golden Hour photography allows you to tell a story through the interplay of light and darkness. It adds a sense of mystery and drama to your images, capturing the viewer's attention and imagination. So, embrace the beauty of these techniques and let your creativity soar during the Golden Hour.
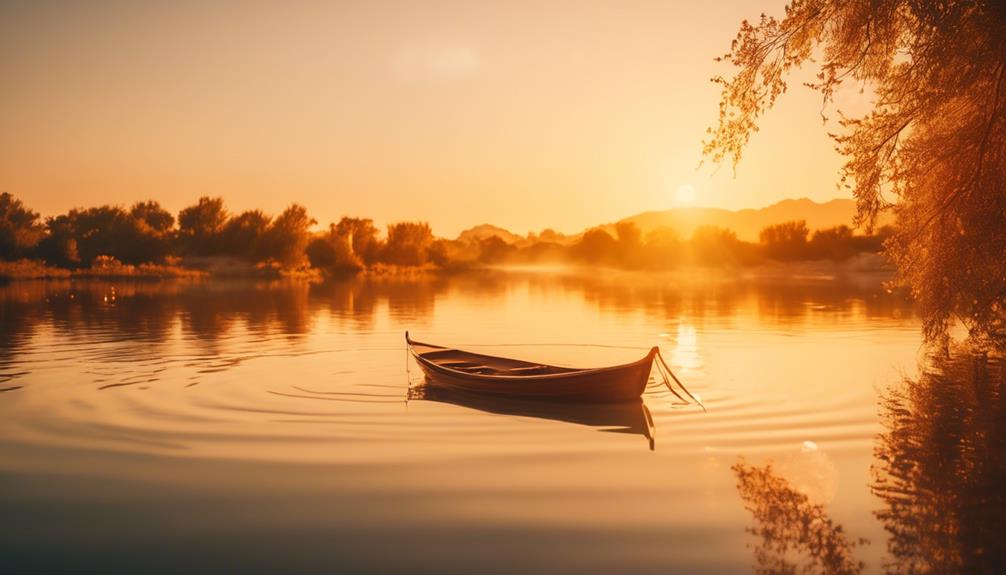
Utilizing Reflections and Water
Reflections and water are essential elements in Golden Hour photography, adding a touch of magic and ethereal beauty to your images. When the warm, golden light of the setting sun dances upon the surface of a tranquil lake or a gently flowing river, it creates a mesmerizing spectacle that can elevate your photographs to another level.
Here are three ways you can harness the power of water reflections and creative angles to capture breathtaking images during the Golden Hour:
- Mirror-like Reflections: Look for still bodies of water, such as lakes or ponds, that will perfectly mirror the surrounding landscape. Position yourself at a low angle to capture the reflection of the golden light, creating a symphony of colors that will leave your audience in awe. Experiment with different compositions and focal lengths to find the perfect balance between the reflection and the scene itself.
- Leading Lines: Water can be a powerful tool to create leading lines that guide the viewer's eye through your photograph. Look for rivers, streams, or even rain puddles that can serve as natural leading lines, drawing attention to the mesmerizing reflections in the water. Position yourself at a creative angle to maximize the impact of these leading lines, and watch as your image comes alive with a sense of depth and dimension.
- Dynamic Water Motion: Don't be afraid to explore the dynamic nature of water during the Golden Hour. Experiment with long exposure techniques to capture the graceful movement of waves crashing against the shore or the cascading flow of a waterfall. The combination of the warm golden light and the soft, flowing water can create a truly magical and ethereal atmosphere in your photographs.
Enhancing Colors During Golden Hour
The vibrant hues that emerge during the Golden Hour are a photographer's dream, painting the sky and landscape with a breathtaking palette of colors. As a photographer, I find myself constantly seeking new ways to capture and enhance these colors to create stunning and captivating images. Thankfully, with modern technology and advanced post-processing techniques, it is now easier than ever to bring out the true beauty of Golden Hour photography.
One of the most effective ways to enhance the colors during the Golden Hour is through color correction in post-processing. By adjusting the white balance, saturation, and hue of the image, you can amplify the warm tones and make the colors appear more vibrant and intense. This technique allows you to create images that truly reflect the magical atmosphere of the Golden Hour.
To help you understand the impact of color correction on Golden Hour photography, I have prepared a comparison table below:
| Before Color Correction | After Color Correction |
|---|---|
|  |  |
As you can see, the image on the left appears dull and lacking in color, while the image on the right is transformed into a vibrant and captivating scene. This is the power of color correction in enhancing Golden Hour photography.
In addition to color correction, there are various other post-processing techniques you can use to further enhance the colors during the Golden Hour. These include adjusting the contrast, applying selective color adjustments, and using graduated filters to balance the exposure. Experimenting with these techniques will allow you to unleash your creativity and create images that stand out from the crowd.
Working With Lens Flares and Sunbursts
Now let's explore the mesmerizing world of lens flares and sunbursts, where the Golden Hour's radiant colors meet the magical play of light and reflections. Working with lens filters can take your golden hour photography to a whole new level of creativity and innovation.
Here are three ways to incorporate lens flares into your portraits:
- Experiment with different filters: Lens filters can enhance the intensity and direction of lens flares, adding a captivating visual element to your portraits. Try using a star filter to create stunning starburst effects or a diffusion filter to soften the light and create a dreamy atmosphere. Don't be afraid to experiment and see how different filters can transform your images.
- Position your subject strategically: When incorporating lens flares into portraits, it's important to position your subject in such a way that the flare enhances the overall composition. Use the flare as a creative element to draw attention to your subject or create a sense of depth and dimension in your images. Play around with different angles and perspectives to find the perfect balance between your subject and the flares.
- Embrace imperfections: Lens flares can sometimes create unexpected and imperfect effects, but that's what makes them so captivating. Embrace those imperfections and let them add a touch of uniqueness to your portraits. Don't be afraid to experiment and push the boundaries of traditional portrait photography. Embracing the unpredictability of lens flares can lead to innovative and awe-inspiring results.
Working with lens flares and sunbursts during the golden hour allows you to create truly breathtaking and innovative portraits. By incorporating lens filters and strategically positioning your subject, you can capture the magic and beauty of this mesmerizing phenomenon. Embrace the imperfections and let your creativity shine through in every shot. Get ready to capture golden hour photos that will leave your audience in awe.
Experimenting With Composition and Framing
As a photographer, one of the most exciting aspects of capturing golden hour photos is the opportunity to experiment with composition and framing, allowing you to create truly unique and visually stunning images. Composition techniques and framing techniques play a crucial role in guiding the viewer's eye and creating a sense of balance and harmony within your photographs. By understanding and utilizing these techniques, you can take your golden hour photos to the next level of creativity and innovation.
When it comes to composition techniques, there are several key principles to keep in mind. The rule of thirds, for example, involves dividing your frame into a 3×3 grid and placing your subject or points of interest along the intersecting lines. This creates a sense of balance and visual interest. Another technique is leading lines, which involves using elements within your scene to guide the viewer's eye towards your main subject. This can be achieved through natural elements such as roads, rivers, or even architectural features.
In terms of framing techniques, there are endless possibilities to explore. Framing your subject within a natural or man-made frame can add depth and context to your photograph. This could be anything from a window, a doorway, or even the branches of a tree. Additionally, experimenting with different perspectives and angles can create a unique and captivating composition. Getting low to the ground or shooting from a high vantage point can completely transform the way your subject is perceived.
By combining these composition and framing techniques with the magical light of the golden hour, you have the power to create breathtaking and innovative photographs. Don't be afraid to push the boundaries and try new things. Let your creativity soar and capture the beauty of the golden hour in a way that is truly your own.
| Composition Techniques | Framing Techniques |
|---|---|
| Rule of Thirds | Natural Frames |
| Leading Lines | Man-Made Frames |
| Perspectives | Unique Angles |
Frequently Asked Questions
How Can I Edit My Golden Hour Photos to Enhance the Colors Even Further?
To enhance the colors in your golden hour photos, I recommend trying out some color grading techniques. Editing software options like Adobe Lightroom or VSCO offer a range of tools to manipulate and enhance colors. Experiment with adjusting the saturation, vibrance, and hue of specific colors to make them pop even more.
Don't be afraid to play around and find your own unique style. The possibilities are endless when it comes to creating breathtaking golden hour photos.
What Are Some Common Mistakes to Avoid When Capturing Golden Hour Photos?
Common mistakes can easily hinder the capture of breathtaking golden hour photos. However, with a few tips for improvement, you can avoid them and achieve stunning results.
It's crucial to pay attention to composition, as well as exposure and white balance settings. Additionally, be mindful of not overediting your photos, as it can lead to unnatural and unappealing results.
Are There Any Specific Camera Accessories or Filters That Can Help Improve Golden Hour Photography?
I've discovered some incredible camera equipment and post-processing techniques that can truly elevate your golden hour photography.
There are specific camera accessories, like polarizing filters, that can enhance the colors and reduce glare during this magical time of day.
Additionally, using a tripod can help you capture those stunning long-exposure shots with perfect clarity.
And when it comes to post-processing, experimenting with different presets and techniques can add a touch of innovation and creativity to your golden hour photos.
How Can I Capture Golden Hour Photos With a Smartphone Camera?
To capture breathtaking golden hour photos with a smartphone camera, it's important to understand the limitations. While smartphone cameras may not have the same capabilities as professional cameras, there are still ways to achieve stunning results.
One tip is to find the best locations that offer interesting subjects and beautiful backgrounds. Experiment with composition, angles, and different lighting techniques to make your photos stand out.
Embrace the challenge and let your creativity shine through your smartphone lens.
Can You Provide Tips for Photographing Moving Subjects During the Golden Hour?
Sure, I can provide tips for photographing moving subjects during the golden hour.
It's an exhilarating challenge to capture action shots during this magical time.
One technique is to use a fast shutter speed to freeze the motion of your subject.
Another tip is to position yourself in a way that takes advantage of the warm, soft light that the golden hour provides.
With these techniques, you can capture breathtaking photos that truly showcase the beauty of the golden hour.
Conclusion
As the golden hour casts its enchanting glow upon the world, capturing breathtaking photos becomes an art form. With the right camera settings, location, and use of natural elements, your images can evoke a sense of wonder and awe.
By incorporating silhouettes, reflections, and vibrant colors, you can create images that transport the viewer to another world. Embrace the lens flares and sunbursts, experiment with composition, and frame your shots to tell a story.
The golden hour is a magical time, and with these tips, you can capture its beauty in all its glory.