Please note this post may contain affiliate links picked by me (Jay) that I have deemed may be of interest or relevant to you the reader of this.
These links do not affect the cost of the thing if you decide to purchase but i may get a little money if you choose to purchase.
For more information on my affiliate link policy click here.
As I step outside, the warmth of the sun envelops me, casting a golden glow on everything it touches. It's as if nature itself has become an artist, painting the world with its radiant brushstrokes.
And in that moment, I realize the incredible power that sunlight holds in transforming ordinary scenes into extraordinary photographs. But capturing the essence of sunlight is no easy task. It requires skill, knowledge, and a keen eye for detail.
So, if you're ready to elevate your photography game and harness the magic of sunlight, then join me as I unravel the 8 key tips that will bring your photos to life.
Key Takeaways
- The golden hour, shortly after sunrise and before sunset, provides soft and warm light that enhances the depth, dimension, and colors of your subjects.
- Shooting during midday can be challenging due to harsh overhead sunlight, but techniques like seeking out open shade or using a diffuser can help soften the light.
- Understanding the direction of light and experimenting with different angles can create depth, shadows, and highlights in your photos.
- Reflectors and backlighting can be used to control and manipulate light, reducing harsh shadows, creating silhouettes, and adding a touch of magic to your photos.
Choose the Right Time of Day
When it comes to capturing better photos, choosing the right time of day is absolutely crucial. The quality of light can make or break a photograph, and the best camera equipment and editing techniques won't matter if you don't have good lighting. As an avid photographer, I've learned the importance of timing and how it can elevate my images to a whole new level.
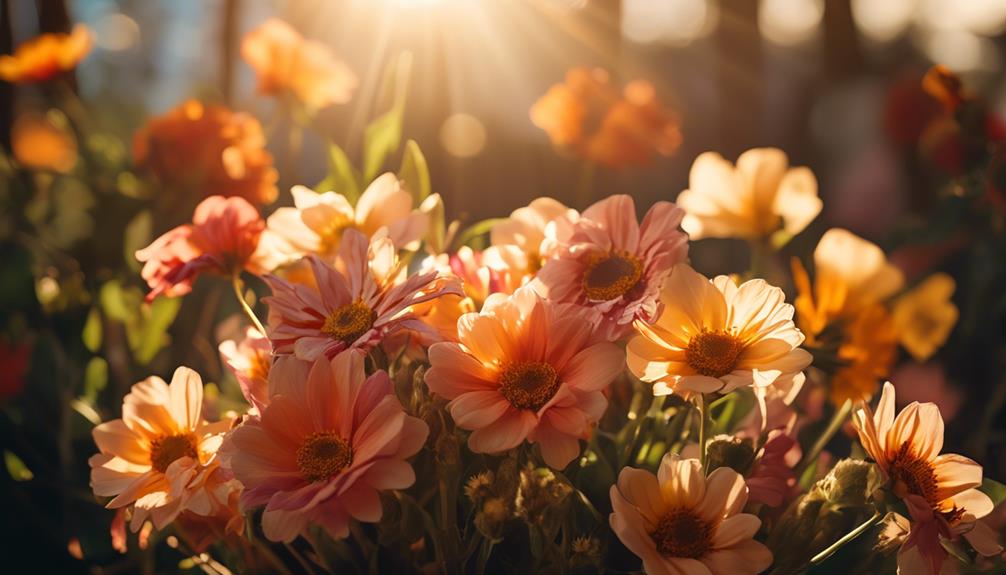
During the golden hour, which occurs shortly after sunrise and before sunset, the sunlight is soft, warm, and diffused. This creates a beautiful, flattering glow that adds depth and dimension to your subjects. The colors are more vibrant, and the shadows are less harsh. It's no wonder that many professional photographers swear by shooting during this time of day. The golden hour provides a magical quality to your images that can't be replicated with any editing techniques.
On the other hand, shooting during midday can be challenging due to the harsh, overhead sunlight that creates unflattering shadows and blown-out highlights. However, if you find yourself in this situation, there are ways to work around it. One technique is to seek out areas with open shade, such as under trees or buildings, to soften the light. Another option is to use a diffuser or reflector to bounce or soften the light.
Find the Perfect Location
To capture the perfect photo, where should I be looking for the ideal location? As a passionate photographer, I understand the importance of finding the right spot to enhance the beauty of my subjects.
When it comes to utilizing sunlight, there are two key factors to consider – finding shade and using natural elements.
Finding shade is crucial in creating stunning photographs. It helps to avoid harsh shadows and overexposure, allowing the sunlight to softly illuminate the scene. Look for areas with trees, buildings, or any kind of overhead coverage that can provide a natural shade. This will give your photos a more balanced and pleasing look, while still allowing the sunlight to work its magic.
Incorporating natural elements in your composition can elevate the overall aesthetics of your photos. These elements can include anything from flowers and rocks to waterfalls and mountains. By incorporating these natural elements, you can create a sense of depth and visual interest, making your photos stand out from the rest. Experiment with different angles and perspectives to showcase the beauty of these elements and how they interact with the sunlight.
Understand the Direction of Light
Understanding the direction of light is essential for capturing stunning and impactful photographs. As a photographer, I've learned that lighting conditions can make or break a shot. Here are four key tips to help you master exposure and make the most of the lighting conditions:
- Observe the angle: The angle at which light falls on your subject can dramatically affect the mood and visual impact of your photo. Experiment with different angles to create depth, shadows, and highlights that enhance the overall composition.
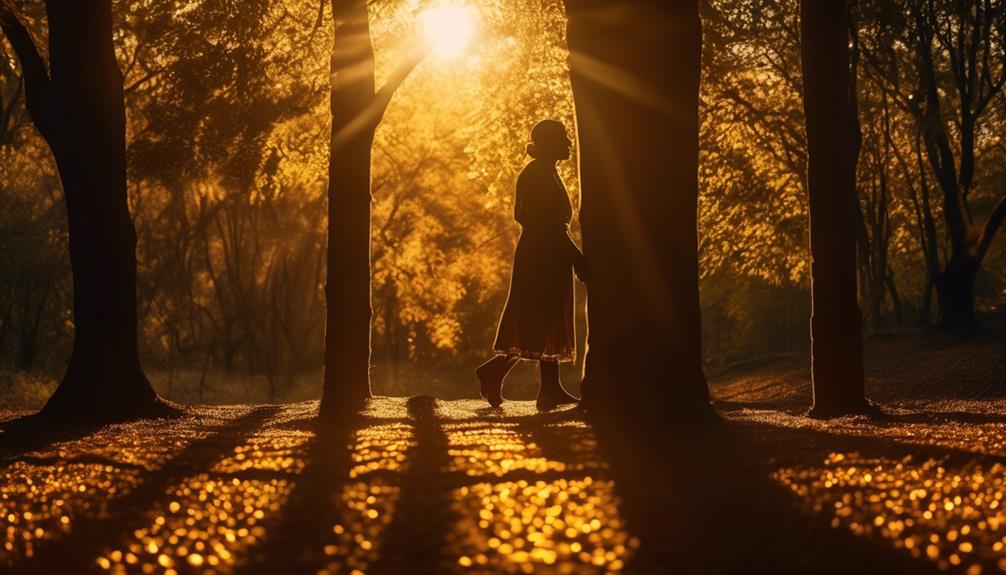
- Utilize backlighting: Backlighting occurs when the light source is behind your subject. This technique can create a beautiful halo effect, illuminating the edges and adding a sense of depth. It can also create stunning silhouettes, highlighting the contours and shapes of your subject.
- Pay attention to shadows: Shadows can add drama, texture, and dimension to your photos. Understanding how shadows interact with your subject can help you create captivating images. Experiment with different lighting directions to manipulate shadows and emphasize certain elements.
- Consider the time of day: The direction of the sun changes throughout the day, and this affects the quality and intensity of light. The golden hour, which occurs during sunrise and sunset, provides soft, warm light that can add a magical touch to your photos. Midday light, on the other hand, can be harsh and create unflattering shadows.
Use Reflectors to Fill in Shadows
Using reflectors is a game-changing technique that can enhance your photos by filling in shadows and bringing out the details in your subject. It's a simple yet powerful tool that allows you to manipulate light and create stunning images. By strategically placing a reflector, you can bounce sunlight onto your subject, effectively reducing harsh shadows and adding a beautiful, natural glow.
When it comes to reflectors, there are two main types to consider: natural reflectors and creative lighting techniques. Natural reflectors are elements present in the environment that can bounce light onto your subject. These can include surfaces like water, sand, or even walls and buildings. By positioning your subject in a way that utilizes these natural reflectors, you can achieve a more balanced and well-lit photograph.
On the other hand, creative lighting techniques involve using man-made reflectors to control and manipulate light. These reflectors come in various shapes, sizes, and materials, allowing you to experiment and get creative with your lighting. Some popular options include collapsible reflector discs, which are portable and easy to use, and silver or white foam boards, which provide different levels of reflection intensity.
To help you better understand the power of reflectors, here is a simple table showcasing the different types of reflectors and their effects:
| Type of Reflector | Effect on Light |
|---|---|
| Natural Reflectors | Bounces sunlight onto subject, reduces shadows |
| Collapsible Reflectors | Provides controlled reflection, enhances lighting |
| Foam Boards | Varies based on color (silver for intense reflection, white for softer glow) |
As you can see, reflectors offer endless possibilities for creative lighting and can significantly improve the quality of your photographs. So next time you're shooting outdoors, don't forget to bring along a reflector and experiment with different angles and positions. The results will speak for themselves, and you'll be amazed at how such a simple tool can transform your images.
Experiment With Backlighting
Experimenting with backlighting can add a captivating and ethereal quality to your photos, elevating them to a whole new level of beauty. By using the sun as a backlight, you can create stunning and dramatic effects in your images. Here are four ways you can make the most of backlighting:
- Creative Angles: To capture the magic of backlighting, try shooting from different angles. Position yourself so that the light is coming from behind your subject, and experiment with different compositions. This will create a halo effect around your subject, adding a dreamy and enchanting atmosphere to your photos.
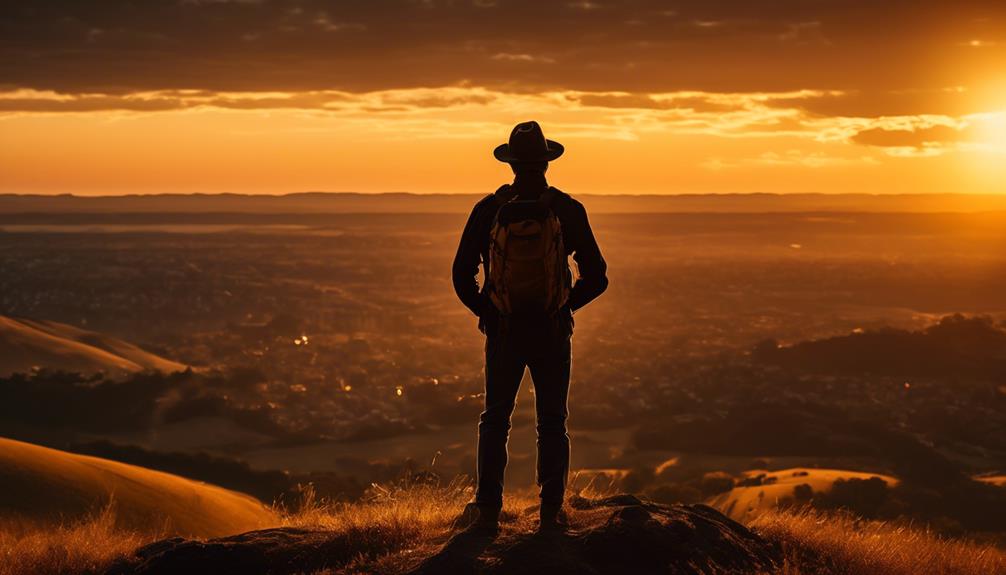
- Silhouette Photography: Backlighting is perfect for creating striking silhouettes. Place your subject between you and the light source, making sure the light is directly behind them. This will darken their features, turning them into a captivating silhouette against a glowing background. Silhouette photography is a powerful way to convey emotion and mystery in your images.
- Play with Flare: Backlighting can also create beautiful lens flares, adding a touch of magic to your photos. Position your subject slightly to the side of the light source and let the light hit your lens at an angle. This will create stunning bursts of light and add a whimsical and ethereal feel to your images.
- Experiment with Shadows: Backlighting can create interesting shadow patterns, adding depth and texture to your photos. Look for opportunities to capture the interplay between light and shadow. This can result in captivating and dynamic images that evoke a sense of intrigue and wonder.
Utilize Golden Hour Lighting
During the golden hour, the soft, warm light of the sun can transform your photos into breathtaking works of art. This magical time of day, which occurs shortly after sunrise or before sunset, offers a unique lighting opportunity that can enhance the mood and quality of your images. As a photographer, it is important to understand how to utilize golden hour lighting to its fullest potential.
One way to make the most of this beautiful light is by using sunlight as a natural filter. The soft, golden hues of the sun can add a warm and dreamy effect to your photos. By positioning your subject in a way that allows the sunlight to pass through or around them, you can create stunning silhouettes or highlighting effects. Experiment with different angles and compositions to capture the sunlight in a way that enhances the overall atmosphere of your image.
Another technique to consider during the golden hour is capturing lens flares creatively. Lens flares occur when sunlight enters the camera lens and creates beautiful streaks or bursts of light. Instead of avoiding them, embrace these flares and use them to your advantage. They can add a touch of whimsy and magic to your photos, giving them a dreamlike quality. Play around with different lens angles and experiment with different compositions to capture lens flares in a way that adds depth and interest to your images.
To help you visualize the impact of utilizing golden hour lighting, take a look at the table below:
| Without Golden Hour Lighting | With Golden Hour Lighting |
|---|---|
|  |  |
| The image appears flat and lacks vibrancy. | The image is bathed in a warm, soft glow, creating a more captivating and atmospheric scene. |
| The colors are dull and lack depth. | The colors are vibrant and rich, adding visual interest and depth to the image. |
| The overall mood is ordinary and unremarkable. | The overall mood is ethereal and enchanting, evoking a sense of awe and wonder. |
As you can see, the difference between utilizing golden hour lighting and not can be dramatic. By harnessing the power of the sun during this magical time of day, you can elevate your photography and create images that truly stand out. So, next time you are out capturing photos, don't forget to embrace the golden hour and let the sun work its magic.
Capture Sun Flares for Dramatic Effect
As a photographer immersed in the enchanting light of the golden hour, I'm captivated by the mesmerizing effect of sun flares, which add a touch of drama and magic to my images. There's something truly captivating about the way the sun's rays dance through the lens, creating bursts of light that can transform an ordinary scene into something extraordinary.
If you're looking to capture sun flares for a dramatic effect, here are a few tips for shooting with a wide aperture:
- Embrace the golden hour: Shooting during the golden hour, when the sun is low on the horizon, will give you the best opportunity to capture stunning sun flares. The warm, soft light during this time of day creates a beautiful, ethereal atmosphere.
- Use a wide aperture: To enhance the effect of sun flares, try shooting with a wide aperture, such as f/2.8 or wider. This will create a shallow depth of field, allowing the sun's rays to appear more pronounced and dreamy.
- Position yourself strategically: Experiment with different angles and positions to find the best composition for your shot. The position of the sun in relation to your subject can greatly impact the presence and intensity of the flares.
- Edit sun flare in post-processing: While capturing sun flares in-camera is ideal, you can also enhance and fine-tune them during post-processing. Use editing tools like the 'add flare' filter or adjust the brightness and contrast to make the flares stand out even more.
Capturing sun flares adds a touch of magic to your photos, elevating them to a whole new level. Don't be afraid to experiment and embrace the beauty of these natural phenomena. With the right techniques and a creative eye, you can create stunning images that evoke emotion and leave a lasting impression.
Embrace the Softness of Overcast Light
Embracing the softness of overcast light can add a gentle and ethereal quality to your photographs, allowing you to capture a unique mood and create stunning imagery. When it comes to photography, many people associate good lighting with bright and sunny days. However, overcast skies offer a different kind of beauty that shouldn't be overlooked. Exploring diffused lighting can open up a world of creative possibilities and enhance the depth in your photos.
Overcast light acts as a natural diffuser, spreading the light evenly and eliminating harsh shadows. This soft, even lighting can create a dreamy atmosphere and make your subjects appear more ethereal. It's like having a giant softbox in the sky, providing a flattering light for portraits or still life photography.
To fully embrace the softness of overcast light, it's important to pay attention to the color temperature. Overcast skies have a cool, bluish tint that can add a sense of tranquility and calmness to your photos. You can enhance this effect by adjusting the white balance settings on your camera or during post-processing.
Incorporating overcast skies into your composition can also enhance the depth in your photographs. The soft light creates a more gradual transition between foreground and background, making your images appear more three-dimensional. You can use this to your advantage by including elements that lead the viewer's eye into the frame, such as pathways or lines.
Frequently Asked Questions
How Can I Adjust My Camera Settings to Capture Sun Flares Effectively?
To capture sun flares effectively, I adjust my camera settings to let in more light.
First, I set a wide aperture to create a shallow depth of field. This helps to emphasize the sun flares and create a dreamy effect.
Then, I lower the ISO to reduce noise and increase the dynamic range.
Lastly, I use spot metering to expose for the brightest part of the flare.
These settings allow me to capture stunning sun flares that add a touch of magic to my photos.
What Are Some Good Reflector Options for Filling in Shadows?
When it comes to filling in shadows, there are a few good reflector options to consider.
Natural light can create beautiful shadows, but sometimes you need a little help to balance the lighting in your photos. That's where reflectors come in handy. They bounce light back onto your subject, reducing harsh shadows and creating a more even and flattering lighting.
There are various sizes and materials available, so choose one that suits your style and needs.
Is It Possible to Achieve Dramatic Lighting Effects Without Using Sun Flares?
Can you achieve dramatic lighting effects without sun flares? Absolutely! There are alternative ways to create stunning lighting in photography.
By utilizing artificial lighting, you can experiment with different techniques and create unique effects. Whether it's using flash, strobes, or even experimenting with colored gels, there are endless possibilities to explore.
Don't limit yourself to just sunlight; embrace the power of artificial light and let your creativity shine.
Innovation in photography is all about pushing boundaries and thinking outside the box.
How Can I Make the Most Out of the Softness of Overcast Light in My Photos?
I love using overcast light for portrait photography. It creates a soft and diffused look that adds a dreamy quality to the photos. To make the most out of this softness, I like to experiment with different angles and compositions.
I also find that shooting nature photography in overcast conditions can produce stunning results. The soft light brings out the subtle details and colors in the landscape, giving the photos a serene and peaceful feel.
It's all about finding creative ways to capture the beauty of softness in your images.
Are There Any Specific Techniques or Tips for Capturing Golden Hour Lighting in Landscape Photography?
Oh, capturing the golden hour lighting in landscape photography is an absolute delight! To create stunning silhouettes, position your subject in front of the warm tones of the setting sun. Play with the angles and experiment with different compositions to enhance those beautiful golden hues.
Adjust your exposure to get the perfect balance of light and shadow. The key is to embrace the magical light of the golden hour and let it paint your landscapes with a touch of enchantment.
Conclusion
In conclusion, mastering the art of using sunlight in your photos is the key to creating stunning and captivating images. By following these 8 key tips, you can harness the power of natural light to enhance your photography skills like never before.
From finding the perfect location to understanding the direction of light, each tip will take your photos to the next level.
So go out there and embrace the sunlight, because with these techniques, you'll soon be capturing breathtaking moments that will leave everyone in awe.