Please note this post may contain affiliate links picked by me (Jay) that I have deemed may be of interest or relevant to you the reader of this.
These links do not affect the cost of the thing if you decide to purchase but i may get a little money if you choose to purchase.
For more information on my affiliate link policy click here.
So, you've heard about ND filters, but you're not quite convinced they're worth the investment. Let me assure you, my friend, that once you unlock the secrets of mastering photography with ND filters, you'll wonder how you ever captured stunning images without them.
In this discussion, I'll share with you seven invaluable tips that will take your photography to the next level. From understanding the different types of ND filters to avoiding common mistakes, we'll cover it all.
Get ready to discover the power of ND filters and unleash your creativity like never before.
Key Takeaways
- ND filters allow photographers to control the amount of light entering the camera, enabling longer exposures and motion blur.
- Different types of ND filters, such as solid, graduated, and reverse ND filters, offer various functionalities for different photography needs.
- Before purchasing ND filters, it is essential to check compatibility with your camera lens and research different brands and reviews.
- Experimentation with different filters, exposure compensation, and shutter speed adjustments is crucial to find the best fit and achieve desired creative effects.
Understanding ND Filters
Understanding ND filters is essential for mastering photography. These innovative tools allow photographers to control the amount of light entering the camera, resulting in stunning and creative images. ND filters, or Neutral Density filters, come in various types, each offering unique benefits for photographers.
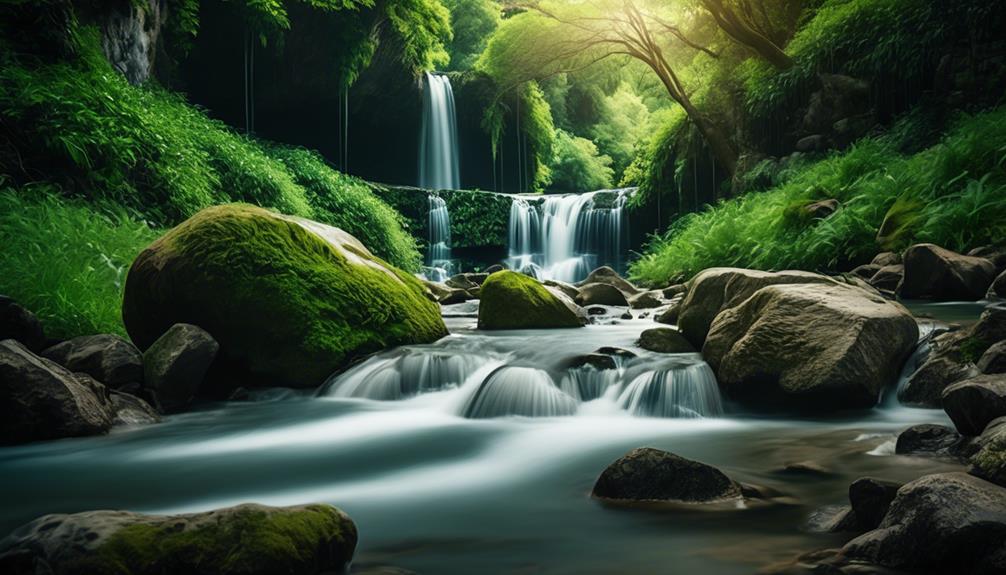
The first type of ND filter is the solid ND filter. It reduces the amount of light evenly across the entire frame, allowing you to achieve longer exposures and capture motion blur. This is perfect for capturing the smooth flow of waterfalls or creating dreamy, ethereal landscapes.
Another type is the graduated ND filter. It has a subtle transition from clear to dark, which is ideal for balancing the exposure between the bright sky and the darker foreground. With this filter, you can capture breathtaking sunset shots without losing details in either the sky or the landscape.
The reverse ND filter is also worth mentioning. It's designed specifically for sunrise and sunset photography, where the brightest area is near the horizon. This filter darkens the brightest part of the frame while maintaining the correct exposure of the rest, creating striking and vibrant images.
The benefits of using ND filters are numerous. By controlling the amount of light entering the camera, you can achieve long exposures, create motion blur, and capture the passage of time. ND filters also allow you to shoot wide open in bright conditions, achieving a shallow depth of field and beautifully blurred backgrounds. Additionally, they can reduce the contrast between the sky and the landscape, resulting in well-balanced exposures.
Understanding the different types of ND filters and their benefits is crucial for any photographer seeking to push the boundaries of creativity. By incorporating these innovative tools into your photography, you can elevate your images to a whole new level.
Choosing the Right ND Filter
Now that we've a solid understanding of ND filters and their benefits, let's dive into the exciting world of choosing the right ND filter for your photography needs.
When it comes to choosing the right ND filter, there are a few key factors to consider. Here are some tips to help you make the best choice:
- ND filter compatibility: Before purchasing an ND filter, it's important to check if it's compatible with your camera lens. Different lenses have different filter thread sizes, so make sure to choose a filter that matches your lens diameter. You can usually find this information on the front of your lens or in the camera's manual.
- ND filter brands: There are various brands of ND filters available in the market, each offering different qualities and features. Some popular brands include B+W, Hoya, Lee Filters, and Formatt-Hitech. Research and read reviews to find a brand that suits your needs and budget.
- Filter density: ND filters come in different densities, indicated by the ND number. The higher the number, the darker the filter and the more light it blocks. It's essential to choose the right density based on the effect you want to achieve. For example, a 3-stop ND filter is ideal for slightly slowing down motion, while a 10-stop ND filter is perfect for creating long exposure effects.
- Filter material: ND filters are available in different materials such as glass and resin. Glass filters are known for their superior optical quality, while resin filters are more affordable and lightweight. Consider your budget and requirements to decide which material suits you best.
Choosing the right ND filter is crucial to achieving the desired effects in your photography. Take the time to research and experiment with different filters to find the perfect fit for your creativity.
Happy shooting!
Proper Exposure Settings With ND Filters
To achieve the best results with ND filters, it's crucial to master the proper exposure settings. When using ND filters, you need to make adjustments to your camera's exposure settings to ensure a well-balanced and properly exposed image. The two main exposure settings to consider are exposure compensation and shutter speed adjustments.
Exposure compensation is a powerful tool that allows you to fine-tune the exposure of your image. With ND filters, you may need to increase the exposure compensation to compensate for the reduction in light entering the camera. By increasing the exposure compensation, you can ensure that your image is properly exposed and retains all the necessary details.
Shutter speed adjustments are another important aspect of using ND filters. These filters limit the amount of light entering the camera, which can result in longer exposure times. To compensate for this, you'll need to adjust your camera's shutter speed. With ND filters, you can experiment with longer exposure times to create stunning effects like silky smooth water or motion blur in moving subjects.
When making these adjustments, it's important to keep in mind the desired effect you want to achieve. For example, if you're capturing a landscape with a flowing river, you might want to use a slower shutter speed to create a dreamy, ethereal effect. On the other hand, if you're photographing a fast-moving subject, you may need to use a faster shutter speed to freeze the action.
Mastering the proper exposure settings with ND filters allows you to unlock a whole new world of creative possibilities. By understanding exposure compensation and making shutter speed adjustments, you can capture stunning images with balanced exposures and captivating effects. So go out there, experiment, and push the boundaries of your photography with ND filters!
Controlling Light With ND Filters
Controlling light with ND filters is an essential skill that can greatly enhance your photography and allow you to capture stunning images with precise control over exposure.
ND filters, or Neutral Density filters, are a versatile tool that can revolutionize your landscape photography. Here are a few ways to effectively use ND filters for landscape photography:
- Long Exposure Photography: ND filters are perfect for capturing motion in your landscape images. By using a strong ND filter, you can slow down the shutter speed and create beautiful, dreamy effects in your photos. Waterfalls become silky smooth, clouds turn into streaks across the sky, and waves transform into a misty haze. This technique adds a sense of movement and dynamism to your images, creating a captivating visual experience.
- Balancing Exposure: When photographing landscapes with a significant difference in brightness between the sky and the foreground, ND filters can help balance the exposure. By reducing the amount of light entering the camera, ND filters darken the sky and allow you to properly expose both the sky and the foreground. This ensures that no details are lost in either area, resulting in a well-balanced and visually pleasing image.
- Enhancing Colors: ND filters can also enhance the colors in your landscape photography. By reducing the amount of light, ND filters can intensify the saturation and richness of the colors in your scene. This adds vibrancy and depth to your images, making them visually striking and captivating.
- Eliminating Distractions: Sometimes, you may encounter elements in your landscape that distract from the main subject. ND filters can help you eliminate these distractions by allowing you to blur or remove them from the frame. By using a long exposure and a strong ND filter, you can create a smooth and seamless image, drawing the viewer's attention solely to your intended subject.
Achieving Long Exposures With ND Filters
Achieving stunning long exposures with ND filters is a game-changing technique that allows photographers to capture mesmerizing images with a sense of movement and ethereal beauty. Mastering night photography and creating creative effects with ND filters go hand in hand, and in this subtopic, I'll share some invaluable tips to help you achieve breathtaking long exposures.
To begin, it's important to choose the right ND filter for the desired effect. ND filters come in various strengths, ranging from 1-stop to 10-stop filters. For long exposures, I recommend using a higher strength filter, such as a 6-stop or 10-stop ND filter, as it will allow you to extend the exposure time and create more dramatic effects.
When shooting long exposures, a sturdy tripod is essential to keep your camera steady throughout the exposure. Any movement during the exposure can result in blurriness, so make sure to use a remote shutter release or the camera's self-timer to minimize shake.
To achieve the best results, shoot in manual mode and set a low ISO to reduce noise. Start with a small aperture, such as f/8 or f/11, to maintain sharpness throughout the image. Then, adjust the shutter speed according to the desired effect. With a strong ND filter, you may need to use exposure times of several seconds or even minutes.
Experiment with different subjects and compositions to unleash your creativity. Long exposures can transform flowing water into silky smooth streams, capture light trails from moving vehicles, or create dreamy, ethereal landscapes. Don't be afraid to try new techniques and push the boundaries of your creativity.
Avoiding Common Mistakes With ND Filters
One important aspect to consider when using ND filters is avoiding common mistakes that can negatively impact your photos. To help you navigate through these potential pitfalls, here are some common misconceptions and troubleshooting techniques to keep in mind:
- Misconception 1: Any ND filter will do: Not all ND filters are created equal. It's essential to invest in high-quality filters to ensure accurate color reproduction and minimal image distortion.
- Misconception 2: Using the wrong filter strength: Choosing the appropriate filter strength is crucial for achieving the desired effect. Consider the lighting conditions and the effect you want to create before selecting the right ND filter.
- Misconception 3: Forgetting about white balance: ND filters can affect the color temperature of your images. To avoid color casts, make sure to adjust your camera's white balance settings accordingly.
- Misconception 4: Neglecting composition: While ND filters allow for longer exposures, don't forget about the importance of composition. Take the time to compose your shot carefully and consider how the filter will enhance the overall image.
When troubleshooting issues with ND filters, there are a few techniques you can employ:
- Technique 1: Manual focus: When using strong ND filters, autofocus may struggle to lock onto your subject. Switching to manual focus will give you better control over the sharpness of your images.
- Technique 2: Bracketing exposures: If you're unsure about the correct exposure settings, bracketing can help you capture a range of exposures to ensure you get the perfect shot.
- Technique 3: Graduated ND filters: Graduated ND filters can be used to balance the exposure between the sky and the foreground in landscape photography. Experiment with different strengths and positions to achieve optimal results.
- Technique 4: Post-processing: Sometimes, even with the best techniques, you may encounter minor issues with your images. Luckily, post-processing software can help you fix any imperfections and enhance your photos further.
Enhancing Creativity With ND Filters
To take your photography to the next level, harness the creative potential of ND filters and unlock a world of captivating and visually stunning imagery.
ND filters not only help you control the amount of light entering your camera but also provide an opportunity to explore creative composition and post-processing techniques.
One of the key benefits of using ND filters is the ability to create long exposure shots. By using a slow shutter speed, you can capture the motion of flowing water, streaking clouds, or even the movement of people in a crowded street. This technique adds a sense of dynamism and ethereal beauty to your photographs, creating a visually striking image that captures the essence of a moment.
ND filters also allow you to experiment with creative composition. With the ability to control the exposure of different parts of your image, you can create a balanced composition by selectively darkening or lightening certain areas. This technique helps draw the viewer's attention to specific elements within the frame, creating a visually pleasing and impactful image.
Furthermore, ND filters provide a great opportunity for post-processing techniques. By using long exposure shots captured with ND filters, you can enhance the visual impact of your images through techniques such as HDR merging or exposure blending. These techniques allow you to combine multiple exposures to create a final image that accurately represents the scene, with details in both the highlights and shadows.
Frequently Asked Questions
How Do ND Filters Affect Image Sharpness aND Clarity?
When it comes to image sharpness and clarity, ND filters can have an impact. The type of ND filter you use and its strength will determine the level of effect on your photos.
It's important to choose the right ND filter strength based on the lighting conditions and desired outcome. By reducing the amount of light entering the lens, ND filters allow for longer exposures, which can enhance sharpness and clarity by minimizing motion blur and balancing exposure.
Can ND Filters Be Used for Video Recording as Well?
Yes, ND filters can definitely be used for video recording too!
Using ND filters in video recording can help achieve a more cinematic look by allowing you to control the amount of light entering the camera.
The pros of using ND filters for video recording include better exposure control, smoother motion blur, and the ability to use wider apertures in bright conditions.
When choosing the right ND filter strength, consider factors like the lighting conditions and desired exposure settings for your video.
Are ND Filters Compatible With All Camera Lenses?
Yes, ND filters are compatible with most camera lenses. However, it's important to choose the right ND filter strength for your specific lens and shooting conditions.
Some lenses may require a step-up or step-down ring to ensure proper compatibility.
By using ND filters, you can control the amount of light entering your lens, allowing for longer exposures and creative effects.
It's an innovative tool that can enhance your photography and open up new possibilities.
How Do I Prevent Color Cast When Using ND Filters?
To avoid color cast when using ND filters, it's crucial to choose the right filter strength. By selecting an ND filter that matches the lighting conditions, you can maintain accurate colors in your photos.
Additionally, consider using high-quality filters from reputable brands to minimize any color distortion. Experimenting with different filters and adjusting your white balance settings can also help achieve accurate and vibrant colors.
With these tips, you'll be able to capture stunning photos without any color cast.
Is It Necessary to Use a Tripod When Using ND Filters for Long Exposures?
No, it isn't necessary to use a tripod when using ND filters for long exposures. With the right techniques and tips, you can achieve stunning handheld shots with ND filters.
For astrophotography, using ND filters can help capture the beauty of the night sky without overexposing the image. By maintaining a steady hand and utilizing proper camera settings, you can create breathtaking long exposure shots without the need for a tripod.
Conclusion
Mastering photography with ND filters is like unlocking a secret world of endless possibilities. With the right filter and exposure settings, you can control light, capture stunning long exposures, and avoid common mistakes.
ND filters are the key to enhancing your creativity and taking your photography to new heights. So, grab your camera, experiment with different filters, and let your imagination run wild.
Embrace the rhythm of light and shadow, and watch as your images come alive with a touch of magic.