Please note this post may contain affiliate links picked by me (Jay) that I have deemed may be of interest or relevant to you the reader of this.
These links do not affect the cost of the thing if you decide to purchase but i may get a little money if you choose to purchase.
For more information on my affiliate link policy click here.
As a photographer, one of the most important aspects to master is depth of field.
You may not know this, but understanding how to control depth of field can completely transform your photographs, taking them from ordinary to extraordinary. It's the secret ingredient that can make your subject pop and create a beautifully blurred background.
But how exactly do you achieve this? Well, in this discussion, I'll be sharing five tips that will help you master depth of field and take your photography skills to the next level.
So, if you're ready to elevate your images and capture stunning shots, keep reading to discover these valuable tips.
Key Takeaways
- Depth of field refers to the range of distance in a photograph that appears in sharp focus.
- Aperture, distance to subject, and focal length are the main factors that determine depth of field.
- Manipulating aperture can create a shallow or greater depth of field.
- Adjusting distance between the camera and subject can also manipulate depth of field.
Understanding Depth of Field Basics
In order to capture stunning photographs with beautiful depth of field, it's essential to have a solid understanding of the basics. So, let's dive right in and explore the concept of depth of field.
Depth of field refers to the range of distance in a photograph that appears to be in sharp focus. It's determined by three main factors: aperture, distance to subject, and focal length. The aperture, or the size of the lens opening, plays a crucial role in controlling depth of field. A wider aperture (smaller f-number) creates a shallow depth of field, where only a small portion of the image is in focus. Conversely, a narrower aperture (larger f-number) produces a greater depth of field, allowing more of the image to be in focus.
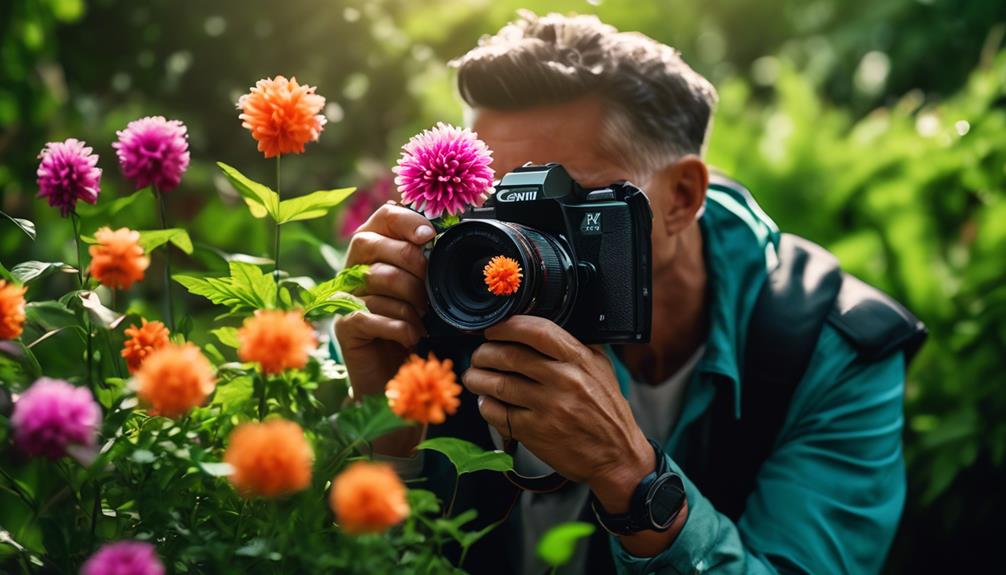
To better understand depth of field, let's consider a few examples. Imagine you're photographing a beautiful flower in a garden. By using a wide aperture like f/2.8, you can blur the background, making the flower stand out in sharp focus. This technique is commonly used in portrait photography, creating a pleasing separation between the subject and the background.
On the other hand, if you're capturing a landscape scene, you might want everything from the foreground to the background to be in sharp focus. To achieve this, you'd use a narrow aperture like f/16 or f/22, allowing for a greater depth of field.
Understanding depth of field opens up a world of creative possibilities in photography. By controlling what's in focus and what's blurred, you can guide the viewer's attention and create captivating images. So, experiment with different apertures, distances, and focal lengths to master the art of depth of field and take your photography to new heights.
Choosing the Right Aperture for Your Desired Effect
To create captivating and visually stunning photographs, it's crucial to select the perfect aperture that will achieve your desired effect. Aperture, represented by the f-number, controls the amount of light entering the camera and determines the depth of field in your image. Understanding how to choose the right aperture setting for different lighting conditions and creative effects is key to taking your photography to the next level.
In bright lighting conditions, such as a sunny day, you'll want to use a smaller aperture (higher f-number) like f/16 or f/22. This will result in a larger depth of field, where both the foreground and background are in sharp focus. It's perfect for landscape photography, where you want to capture every detail from the front to the back of the scene.
On the other hand, in low light situations or when you want to isolate your subject, a wider aperture (lower f-number) like f/2.8 or f/4 will create a shallow depth of field. This means that your subject will be in sharp focus, while the background will be beautifully blurred, creating a dreamy and artistic effect. It's ideal for portraits, where you want your subject to stand out and be the main focus of attention.
Aperture manipulation also allows you to play with creative effects. By using a wide aperture, you can create a bokeh effect, where out-of-focus lights or highlights in the background appear as soft, pleasing circles. This adds a touch of magic and enchantment to your images, making them visually appealing and unique.
Using Focal Length to Control Depth of Field
With a solid understanding of how aperture affects depth of field, let's now explore how you can use focal length to further control and manipulate the depth of field in your photographs.
Focal length refers to the distance between the camera's lens and the image sensor, and it plays a crucial role in determining the depth of field.
Experimenting with zoom lenses can unlock a world of creative possibilities when it comes to depth of field effects. Zoom lenses allow you to adjust the focal length, giving you the flexibility to either compress or expand the depth of field. By zooming in, you can create a shallow depth of field, blurring the background and isolating your subject. On the other hand, zooming out can increase the depth of field, allowing for more elements to be in focus.
But why is controlling the depth of field important in photography? Well, depth of field can be used as a powerful storytelling tool. By selectively focusing on certain parts of the frame, you can guide the viewer's attention and convey a specific message or emotion. For example, a shallow depth of field can be used to highlight a single subject in a busy environment, emphasizing their importance or vulnerability. On the other hand, a large depth of field can be used to capture a sweeping landscape, inviting the viewer to explore every detail.
Utilizing Distance to Influence Depth of Field
By strategically adjusting the distance between your camera and the subject, you can effectively influence and manipulate the depth of field in your photographs. This technique allows you to create stunning and innovative images that captivate your audience.
Here are some ways in which you can utilize distance to influence depth of field:
- Using foreground elements for depth of field manipulation: Placing objects in the foreground at different distances from your camera can create a sense of depth and dimension in your photographs. By focusing on the subject in the background, you can blur the foreground elements, leading the viewer's eye directly to the main subject.
- Creating bokeh effects with depth of field manipulation: Bokeh refers to the aesthetic quality of the out-of-focus areas in an image. By adjusting the distance between your camera and the subject, you can achieve a shallow depth of field, resulting in a beautifully blurred background with bokeh. This technique is perfect for portraits, where you want the subject to stand out from the background.
- Experimenting with different distances: Don't be afraid to play around with the distance between your camera and the subject. Moving closer to the subject will decrease the depth of field, while moving further away will increase it. This experimentation will allow you to find the perfect balance and create unique compositions.
- Using distance for storytelling: The distance between the camera and the subject can also be used to convey a narrative in your photographs. By intentionally placing the subject closer or further away, you can evoke emotions, highlight details, or create a sense of intimacy.
Incorporating these techniques into your photography will elevate your images to a whole new level. So, grab your camera and start experimenting with distance to unlock the full potential of depth of field in your photographs. Get ready to impress your audience with innovative and visually stunning shots!
Mastering Depth of Field With Manual Focus
I have discovered that manually adjusting the focus of my camera is the key to mastering depth of field in my photography. It allows me to achieve the beautiful bokeh effect that adds a touch of magic to my images. While manual focus may seem daunting at first, it opens up a world of possibilities in controlling depth of field.
One of the biggest challenges of manual focus in depth of field control is getting the focus just right. It requires precision and practice to achieve the desired effect. However, the rewards are worth it. By manually adjusting the focus, I can create a sense of depth and dimension in my photos, drawing the viewer's attention to the subject while beautifully blurring the background.
To achieve bokeh with manual focus, I start by selecting a wide aperture to create a shallow depth of field. This allows me to isolate the subject and create a dreamy, out-of-focus background. Then, I carefully adjust the focus ring until my subject is sharp and in focus. It may take a few tries, but with practice, I've become more skilled at achieving the perfect balance between sharpness and blur.
Another challenge of manual focus is the need to constantly adjust the focus as the distance between the camera and subject changes. This can be particularly challenging when photographing moving subjects or in low light conditions. However, with patience and practice, I've learned to anticipate these changes and adjust the focus quickly and accurately.
Mastering depth of field with manual focus has allowed me to create stunning images that stand out from the crowd. It has given me a greater sense of control and creativity in my photography. So, if you're looking to take your images to the next level, I highly recommend exploring the world of manual focus and discovering the art of depth of field control.
Frequently Asked Questions
How Can I Use Depth of Field to Create a Sense of Depth and Dimension in My Photographs?
To create a sense of depth and dimension in my photographs, I use depth of field strategically. By adjusting the aperture settings, I can control the amount of background blur, creating a beautiful bokeh effect.
This technique isn't just limited to portraits; it can also be applied in landscape photography. By focusing on a specific subject and blurring the background, I can make my images feel more three-dimensional, adding a captivating and immersive quality to my work.
Are There Any Specific Camera Settings or Techniques That Can Help Me Achieve a Shallow Depth of Field?
There are definitely camera techniques and aperture settings that can help you achieve a shallow depth of field. By adjusting the aperture to a lower f-stop number, you can create a beautiful blurry background that really makes your subject stand out.
Plus, experimenting with different focal lengths and distances can also enhance the depth of field effect.
Can Depth of Field Be Adjusted After the Photo Is Taken, Using Post-Processing Software?
Yes, depth of field can be adjusted after the photo is taken using post-processing software. It's an incredible feature that allows photographers to have more control over their images.
However, while adjusting depth of field in post-processing is an option, it's always best to achieve the desired effect in-camera. There are alternative techniques for creating depth in photography, such as changing the aperture, using different lenses, or manipulating the distance between the subject and the background.
These techniques can result in stunning and unique images.
Are There Any Limitations or Drawbacks to Using a Wide Aperture to Achieve a Shallow Depth of Field?
Using a wide aperture to achieve a shallow depth of field has its limitations and drawbacks.
While it creates a beautiful, blurry background that can make your subject pop, it also means that you have a smaller area of sharp focus.
This can be challenging when photographing multiple subjects or when you need everything in the frame to be in focus.
Additionally, using a wide aperture may result in less light entering the camera, requiring longer exposure times or higher ISO settings.
How Can I Ensure That My Subject Is in Focus While Still Achieving a Desired Depth of Field Effect?
To achieve a desired depth of field effect while keeping my subject in focus, I rely on using depth of field to create a blurred background. By setting a wide aperture, I can create a shallow depth of field, which allows me to isolate my subject and make it stand out.
To ensure sharpness, I also make use of manual focus or autofocus points, adjusting them accordingly to the subject. This technique adds a touch of creativity and innovation to my photography.
Conclusion
In conclusion, mastering depth of field in photography is essential to capturing stunning and captivating images.
Did you know that the aperture you choose can greatly impact the depth of field? By selecting a larger aperture, such as f/1.8, you can achieve a shallow depth of field, creating a beautiful blurred background that draws attention to your subject.
With the right techniques and practice, you can become a skilled photographer who expertly controls depth of field to enhance your visual storytelling.
So get out there and start experimenting!